VitePress部署
一、Github Pages部署
优势:配置完成后,自动化静态页面部署,无需自己申请公网ip和域名,且页面的最后更新时间通过
git commit命令提交markdown文件后自动生成缺点:github.io地址访问并不稳定,而且在前期git push时也会遇到无法连接的问题,项目的路由地址也需要相应调整
TIP
以下所有的操作,都建议需要使用科学上网方式后进行
当然你也可以碰碰运气,有时候还是能直接访问的
不要问我科学上网是什么,百度一下你都知道了
1. Github注册
登录https://github.com/,点击右上角的 Sign up,根据页面提示进行账户注册

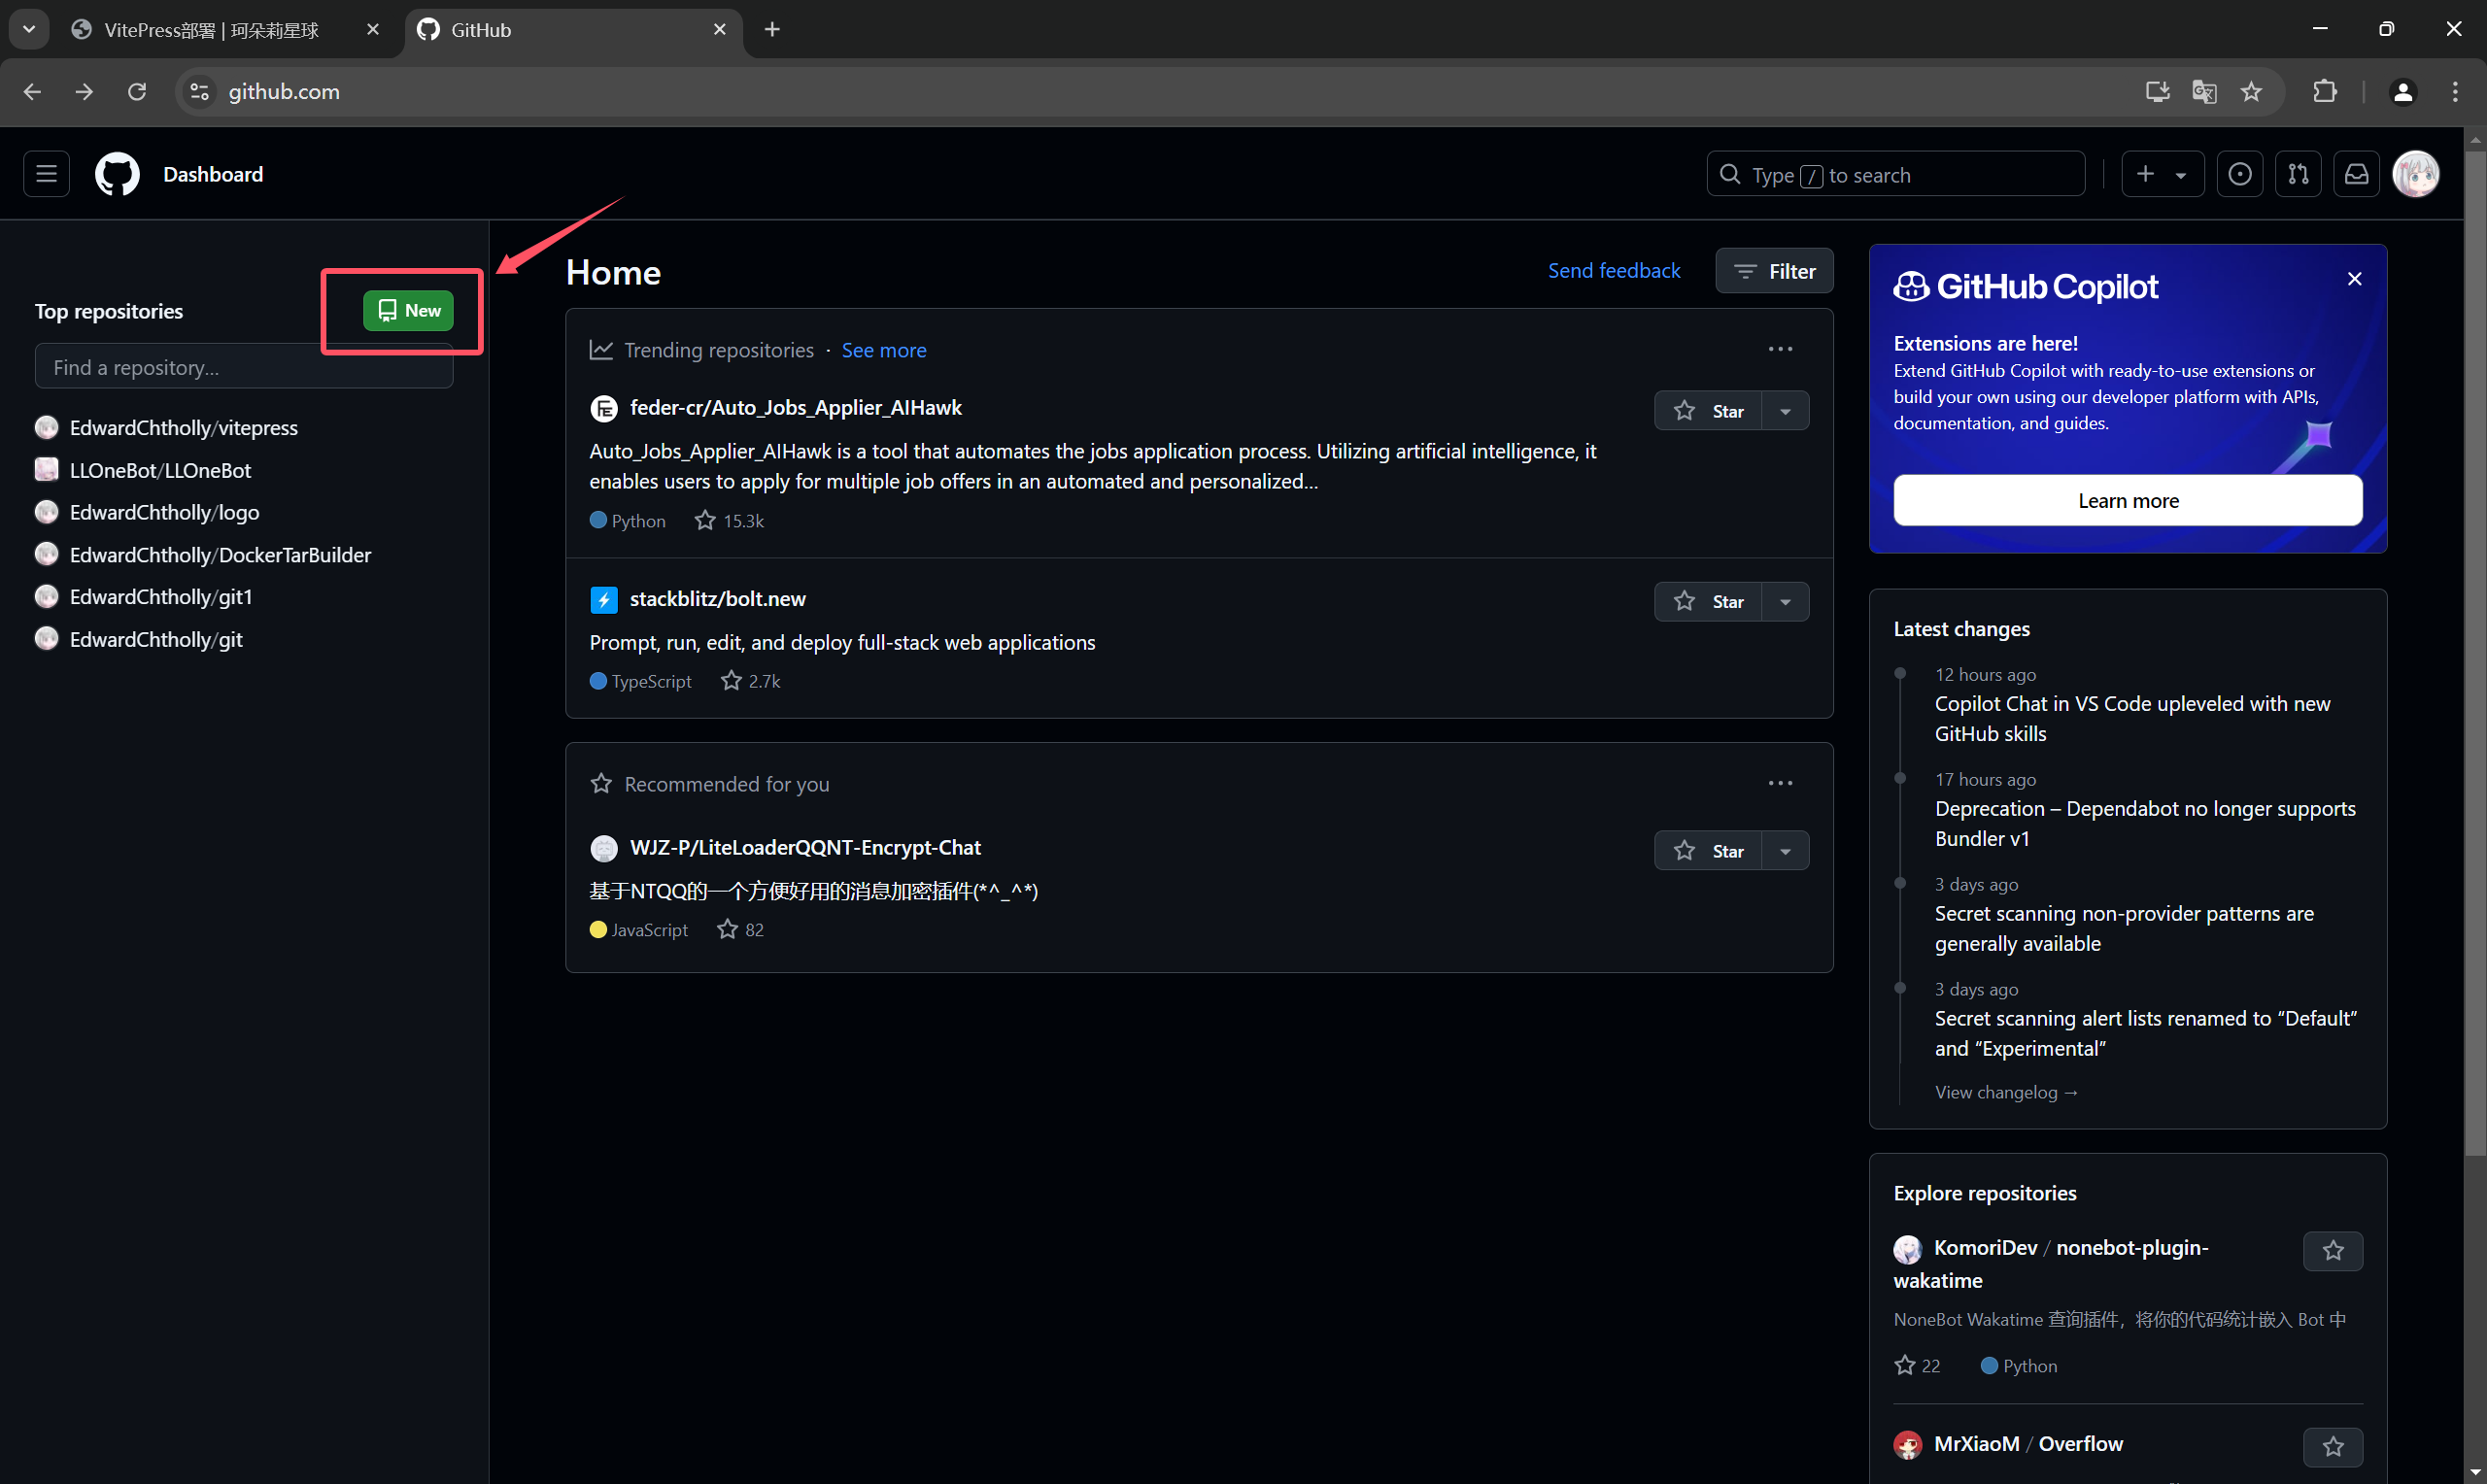
2. 创建仓库
登录已注册账户,在首页点击new,新建一个仓库
输入仓库名称,保持默认配置项不变,点击Create

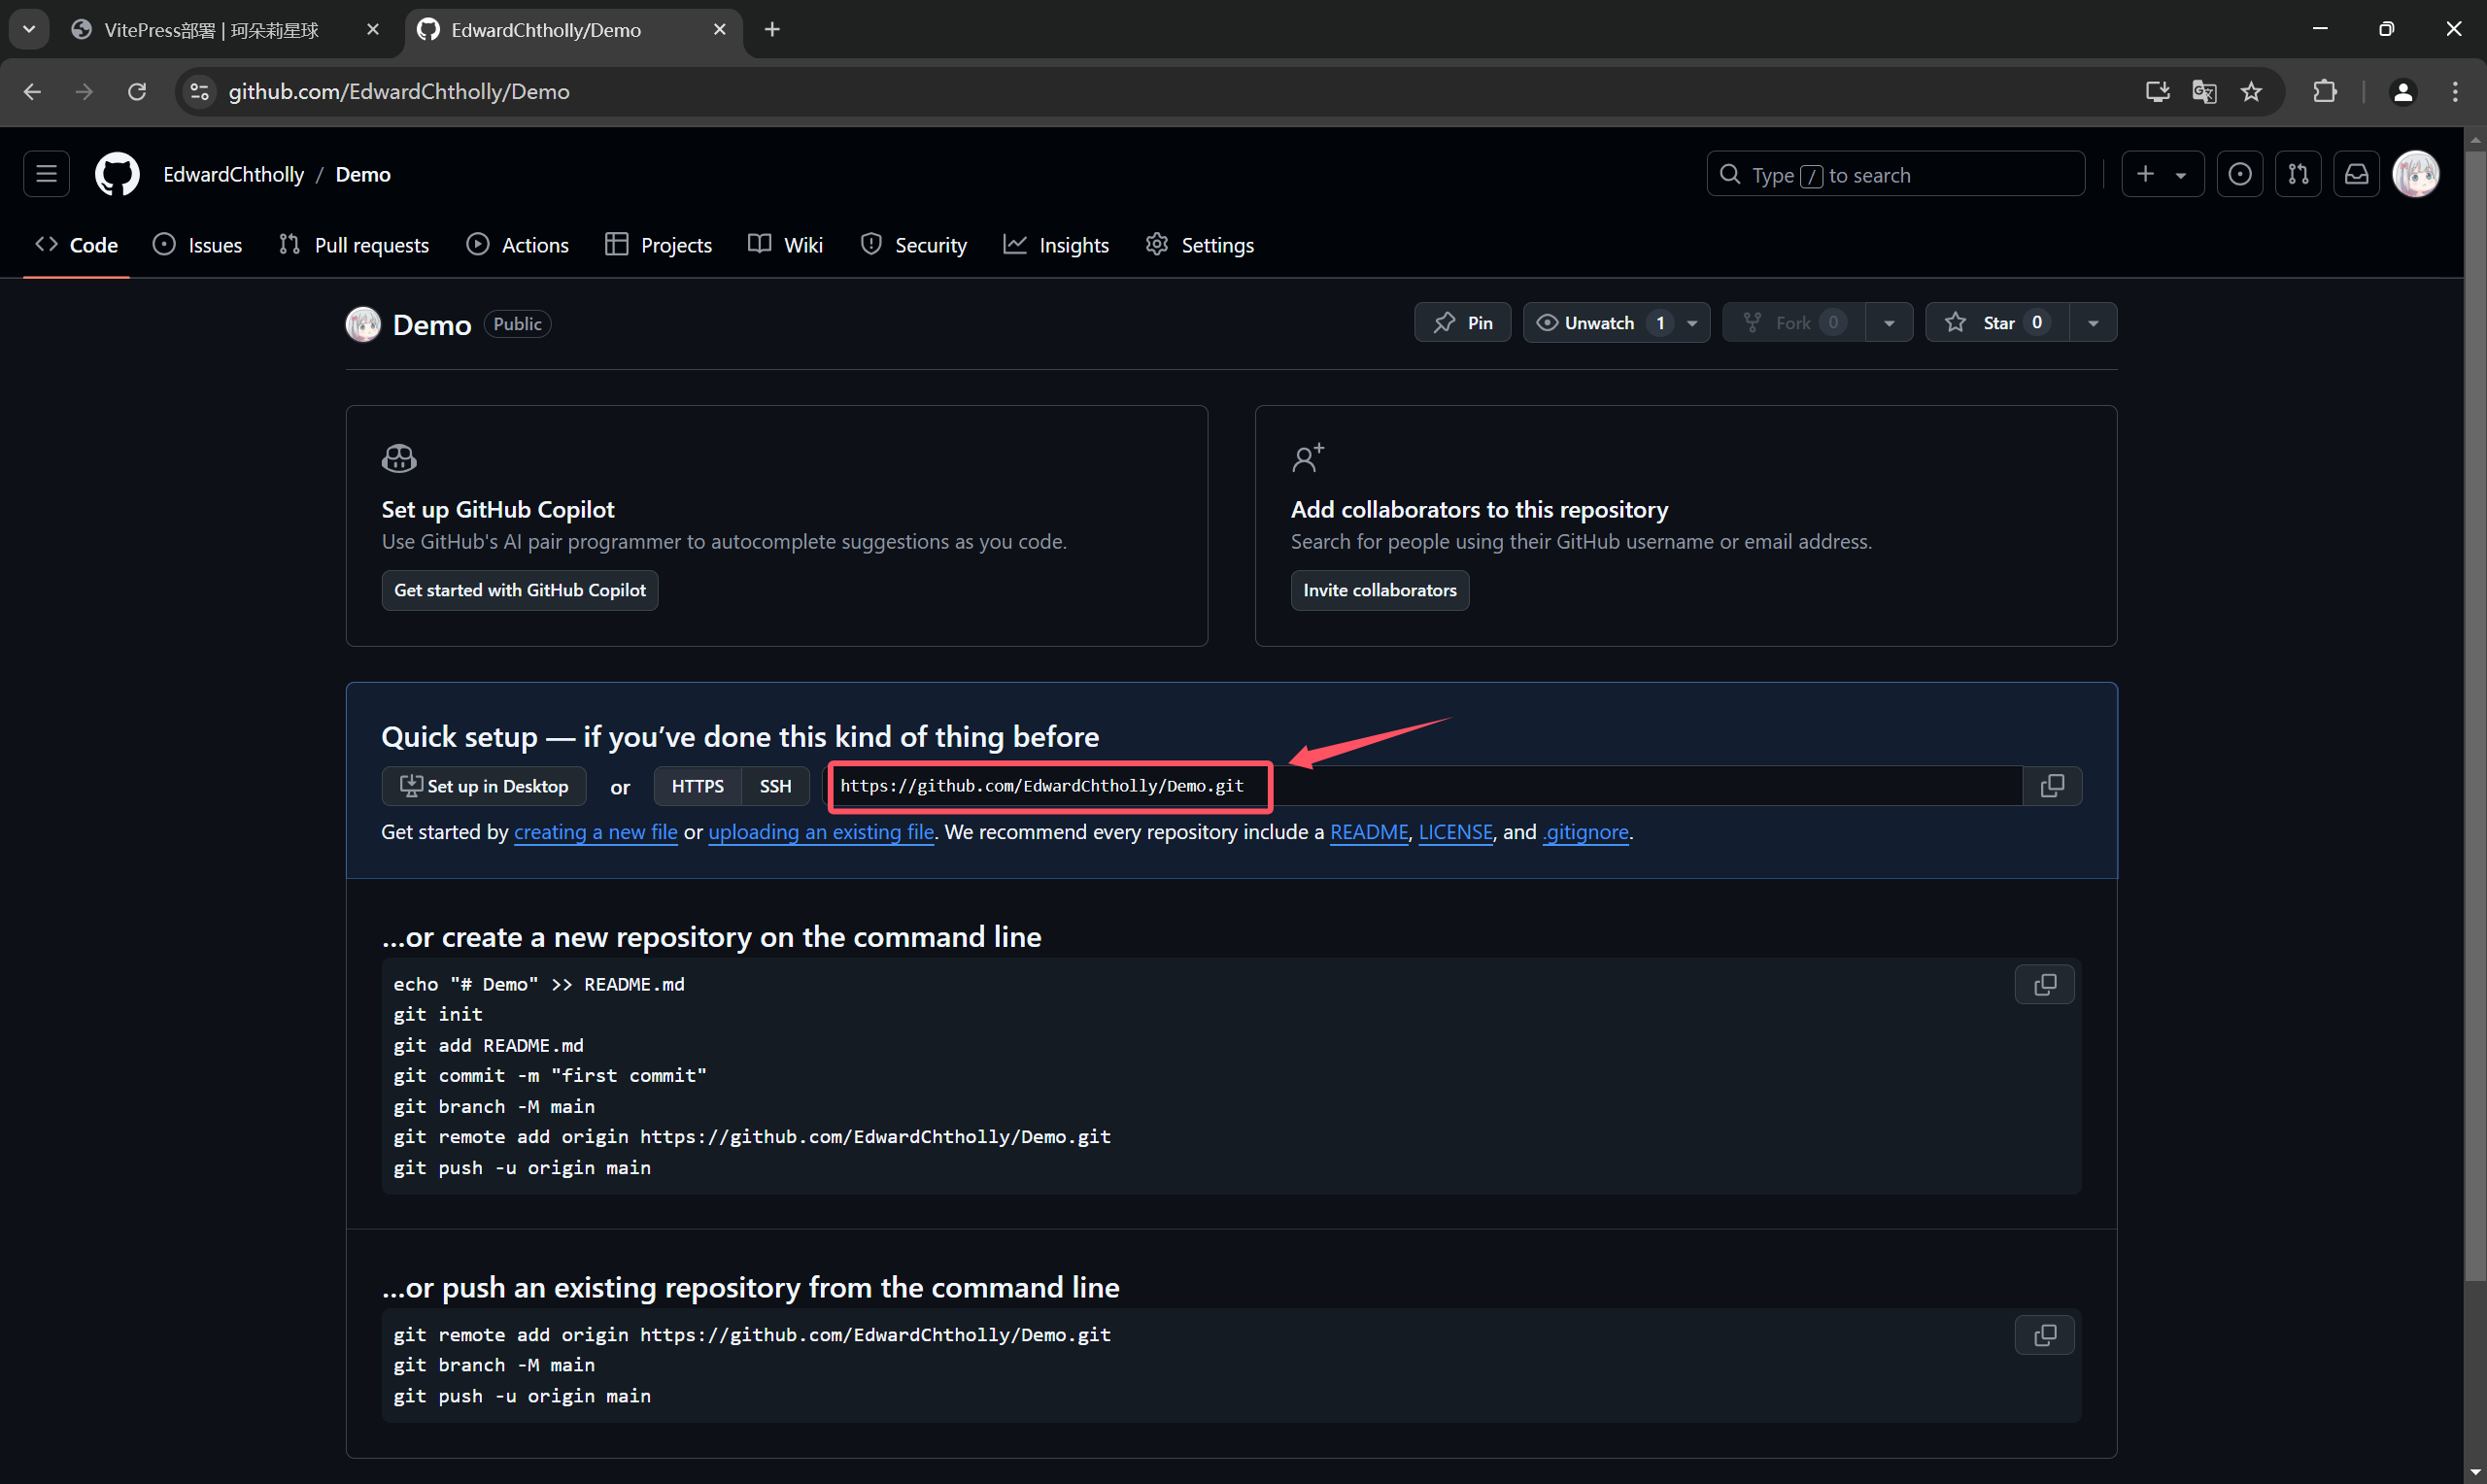
创建完成,记录下这里的仓库地址
我创建的仓库地址是 https://github.com/EdwardChtholly/Demo.git
3. 修改config路由
打开 config.mjs 文件,添加 base: '/Demo/',其中 '/Demo/' 为前面你的仓库名称
import { defineConfig } from 'vitepress'
import mdItCustomAttrs from 'markdown-it-custom-attrs'
// https://vitepress.dev/reference/site-config
export default defineConfig({
base: '/Demo/',
title: "珂朵莉星球",
description: "爱德华の珂朵莉星球",
markdown: {
config: (md) => {
// use more markdown-it plugins!
md.use(mdItCustomAttrs, "image", {
"data-fancybox": "gallery",
});
},
},
head: [
[
"link",
{
rel: "stylesheet",
href: "https://cdn.jsdelivr.net/npm/@fancyapps/ui/dist/fancybox.css",
},
],
[
"script",
{
src: "https://cdn.jsdelivr.net/npm/@fancyapps/ui@4.0/dist/fancybox.umd.js",
},
],
],
themeConfig: {
// https://vitepress.dev/reference/default-theme-config
nav: [
{ text: 'Home', link: '/' },
{ text: 'Examples', link: '/markdown-examples' }
],
sidebar: [
{
text: 'Examples',
items: [
{ text: 'Markdown Examples', link: '/markdown-examples' },
{ text: 'Runtime API Examples', link: '/api-examples' }
]
}
],
socialLinks: [
{ icon: 'github', link: 'https://github.com/EdwardChtholly' }
],
docFooter: {
prev: "上一页",
next: "下一页",
},
// https://vitepress.dev/zh/reference/default-theme-config#outline
outline: {
level: [2, 3],
label: "页面导航",
},
lastUpdated: {
text: "最后更新于",
formatOptions: {
dateStyle: "short", // full
timeStyle: "short", // medium
},
},
langMenuLabel: "多语言",
returnToTopLabel: "回到顶部",
sidebarMenuLabel: "菜单",
darkModeSwitchLabel: "主题",
lightModeSwitchTitle: "切换到浅色模式",
darkModeSwitchTitle: "切换到深色模式",
// 设置搜索框的样式
search: {
provider: "local",
options: {
translations: {
button: {
buttonText: "搜索文档",
buttonAriaLabel: "搜索文档",
},
modal: {
noResultsText: "无法找到相关结果",
resetButtonTitle: "清除查询条件",
footer: {
selectText: "选择",
navigateText: "切换",
},
},
},
},
}
}
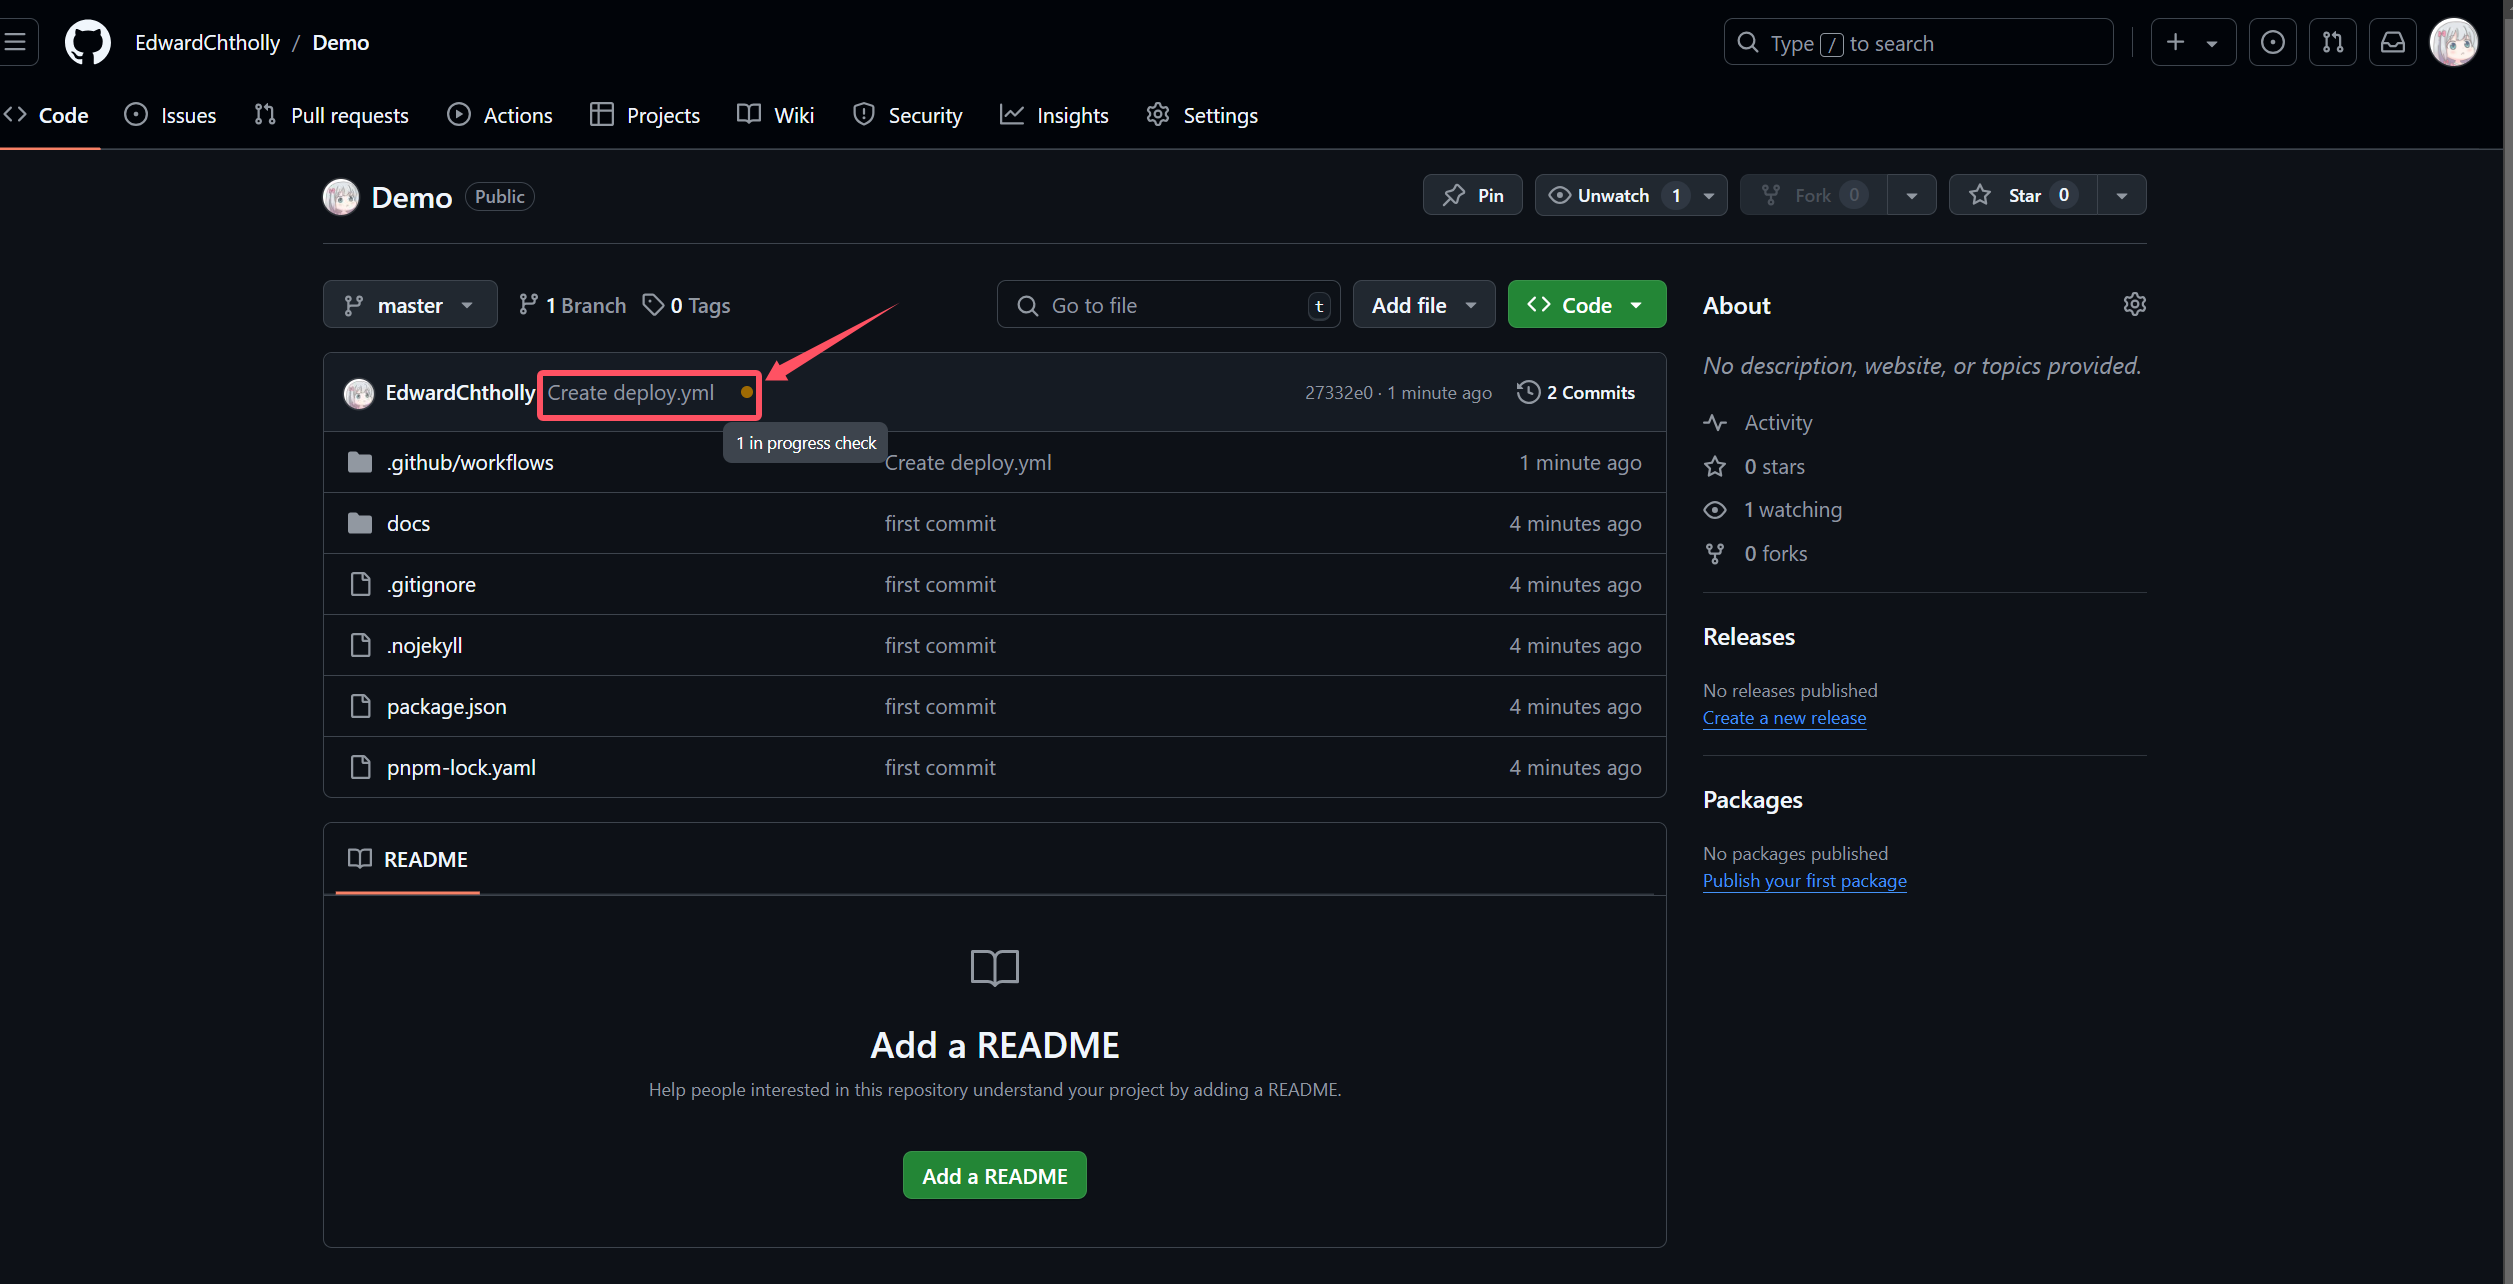
})4. 推送至Github仓库
- 初始化git仓库
PS D:\vitepress> git init- 创建.gitignore文件
PS D:\vitepress> ni .gitignore- 添加以下内容至.gitignore文件内容
node_modules
.DS_Store
dist
dist-ssr
cache
.cache
.temp
*.local- 创建.nojekyll文件
PS D:\vitepress> ni .nojekyll- 添加本地项目文件到git仓库
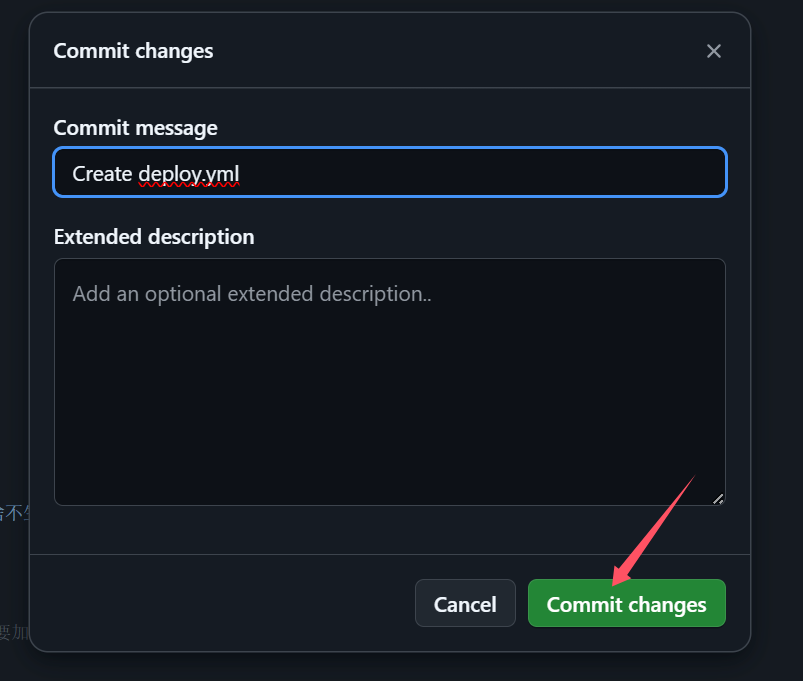
PS D:\vitepress> git add .- 创建第一次commit提交
PS D:\vitepress> git commit -m "first commit"- 添加创建的远程仓库地址到本地
PS D:\vitepress> git remote add origin https://github.com/EdwardChtholly/Demo.git- 推送项目到github
PS D:\vitepress> git push -u origin master5. 创建Github工作流
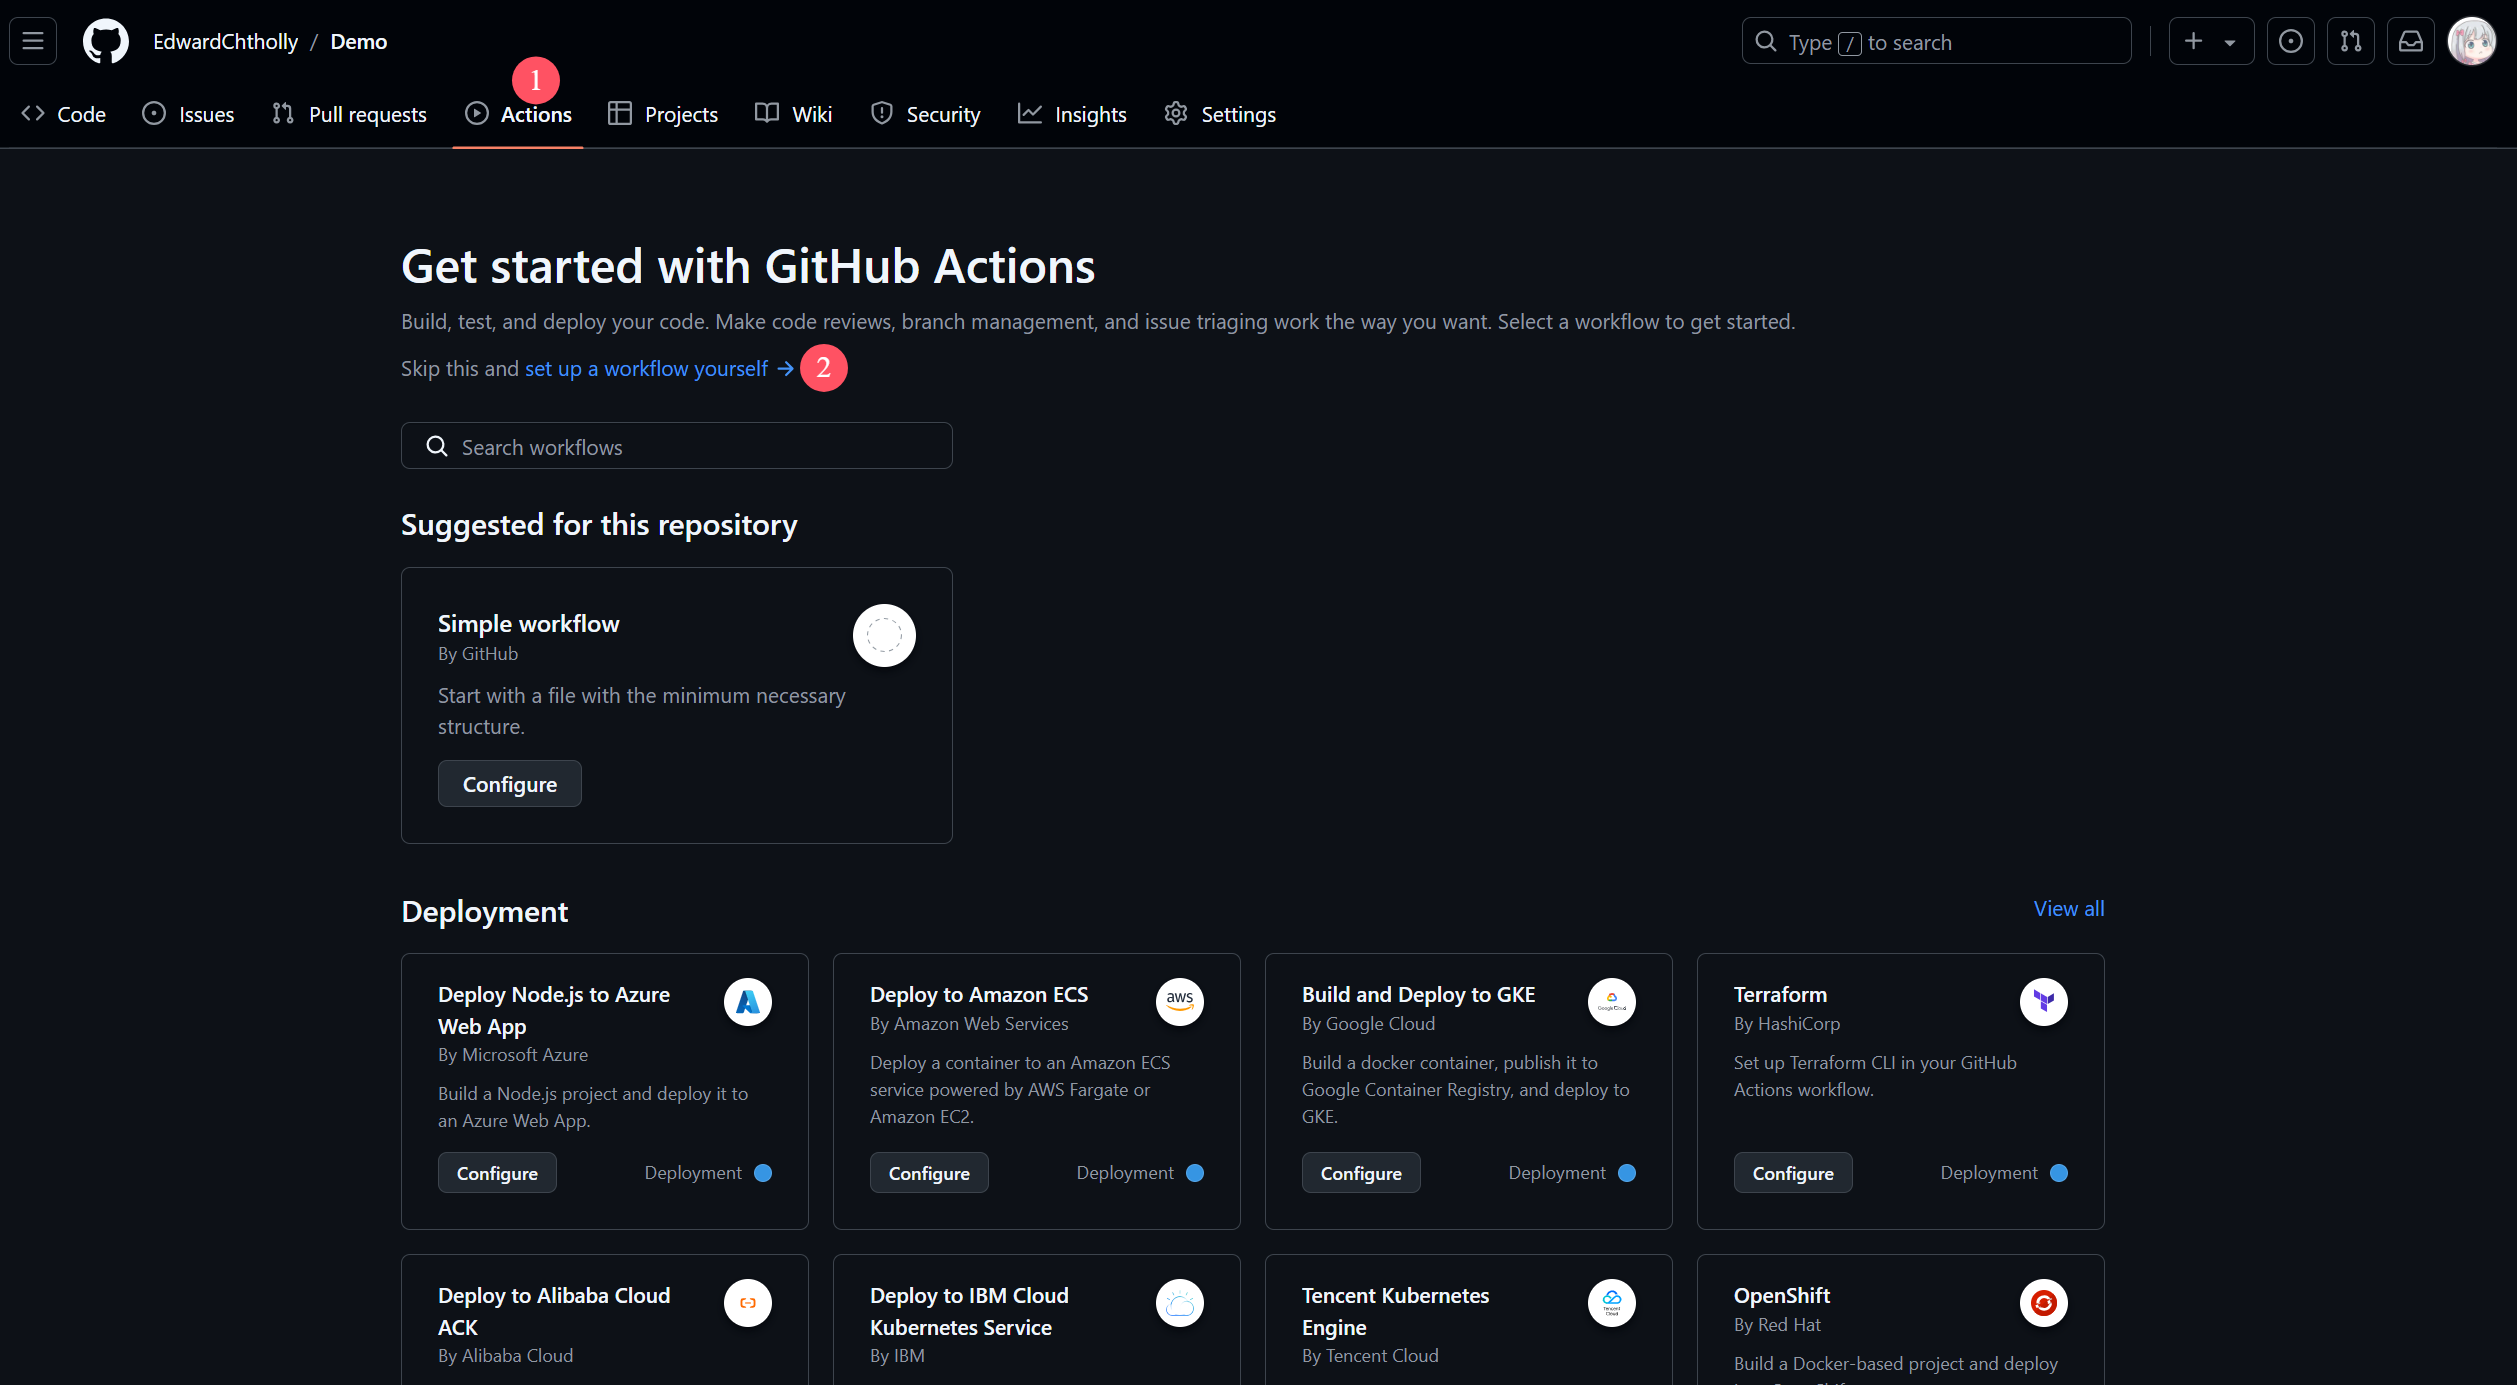
设置选择github actions
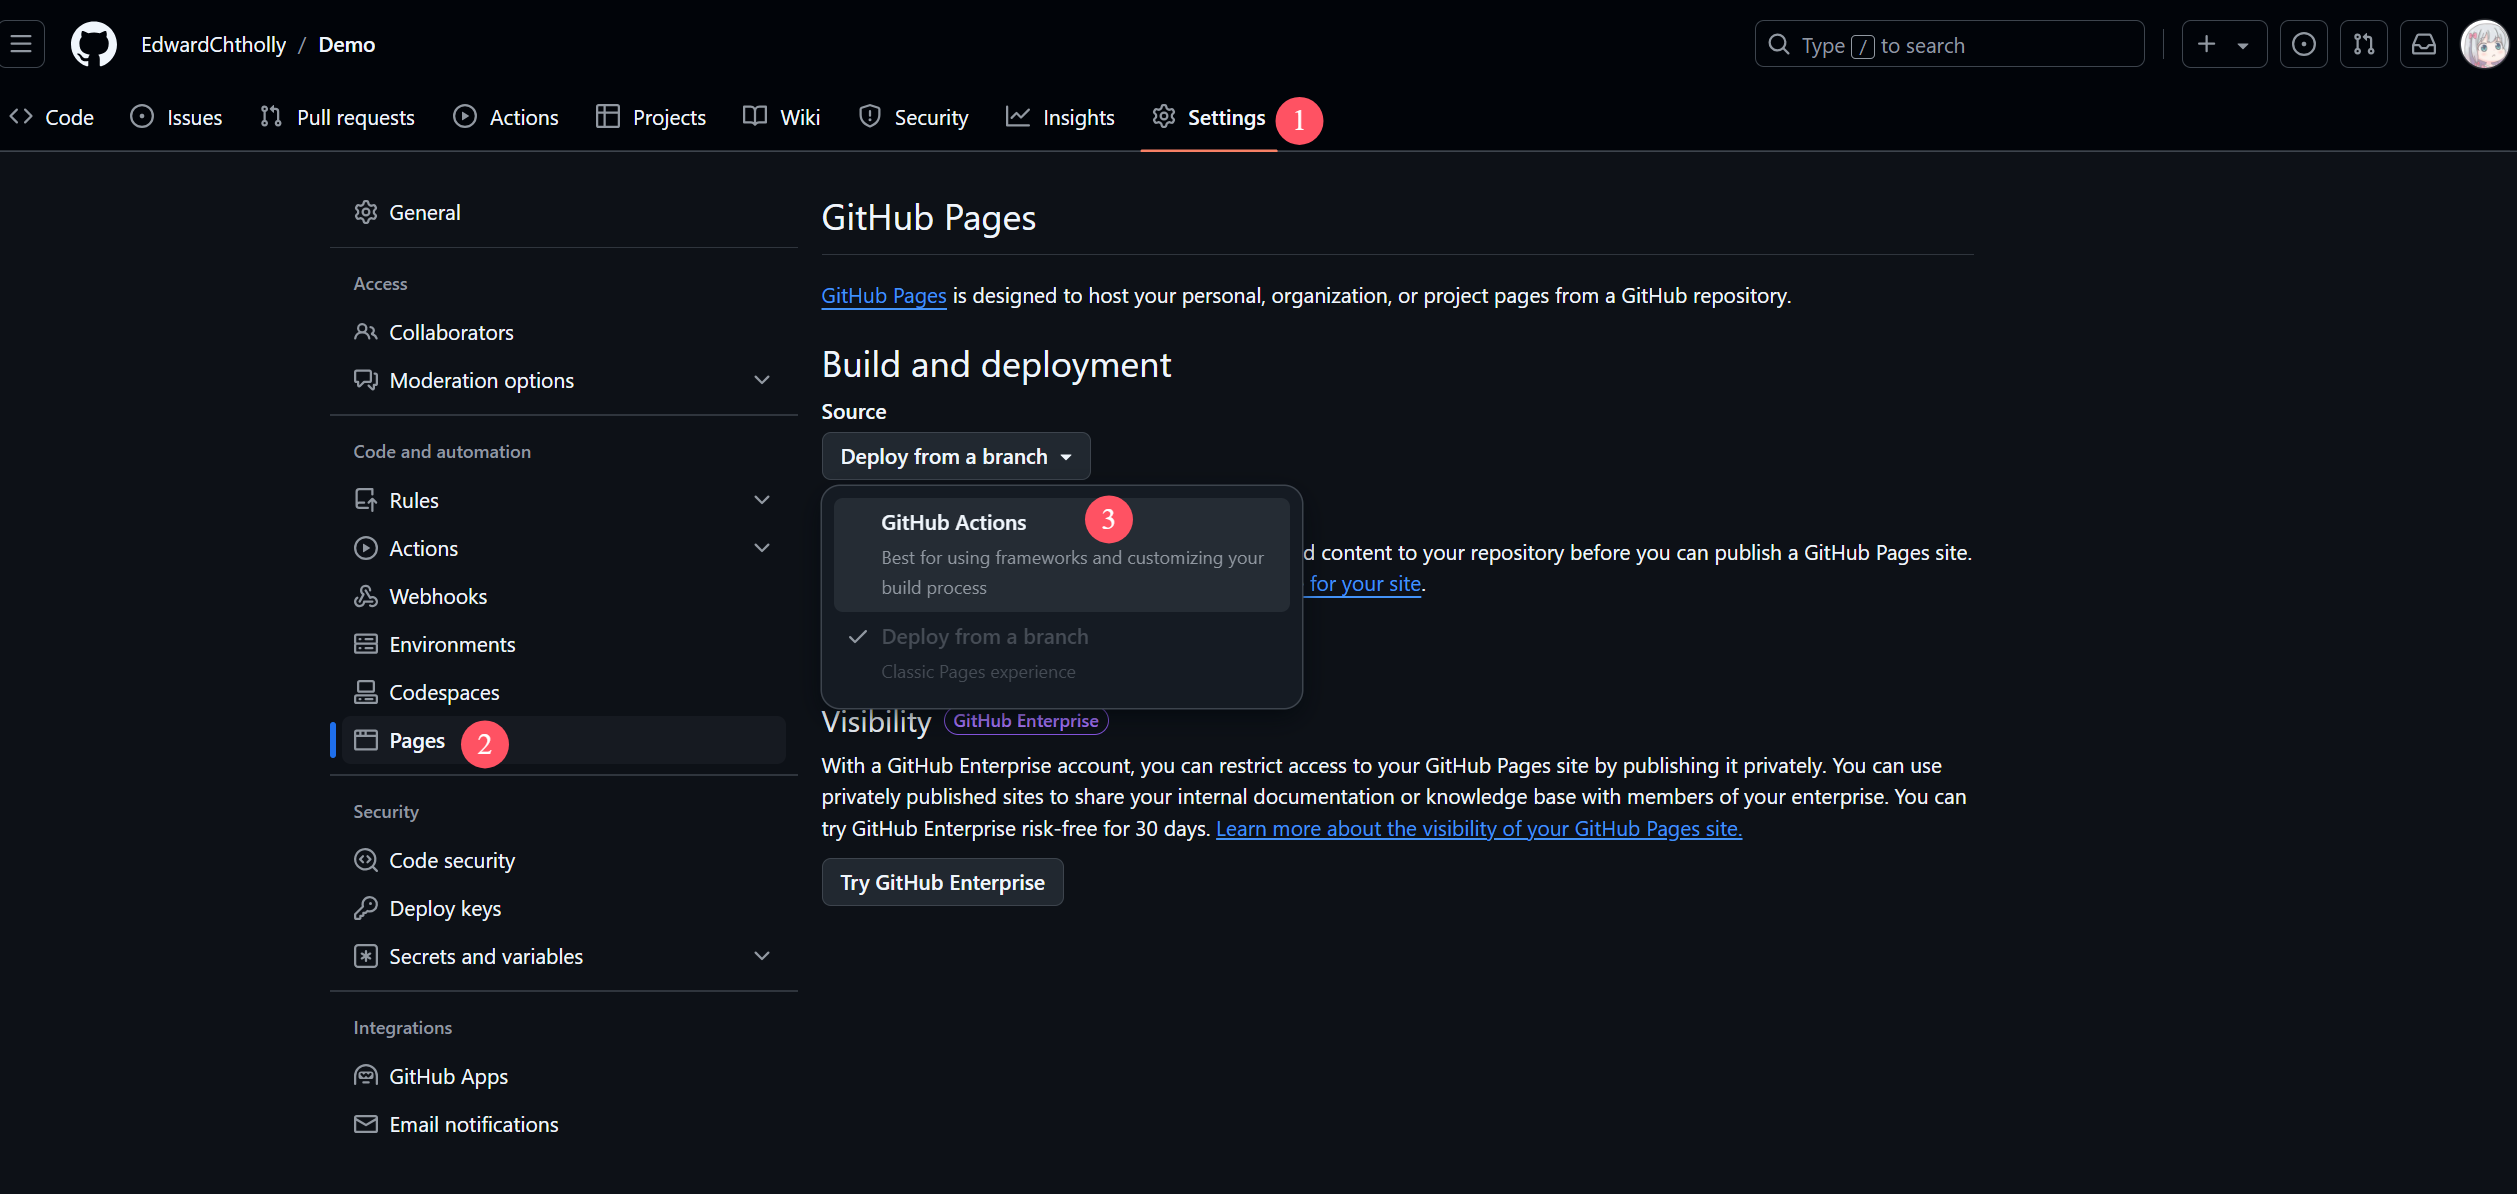
设置工作流
6. 创建并重命名deploy脚本
name: Deploy VitePress site to Pages

on:
  push:
    branches: [master]

# 设置tokenn访问权限
permissions:
  contents: read
  pages: write
  id-token: write

# 只允许同时进行一次部署,跳过正在运行和最新队列之间的运行队列
# 但是,不要取消正在进行的运行,因为我们希望允许这些生产部署完成
concurrency:
  group: pages
  cancel-in-progress: false

jobs:
  # 构建工作
  build:
    runs-on: ubuntu-latest
    steps:
      - name: Checkout
        uses: actions/checkout@v3
        with:
          fetch-depth: 0 # 如果未启用 lastUpdated,则不需要
      - name: Setup pnpm
        uses: pnpm/action-setup@v2 # 安装pnpm并添加到环境变量
        with:
          version: 9.12.0 # 指定需要的 pnpm 版本,最好跟一开始安装的一致
      - name: Setup Node
        uses: actions/setup-node@v3
        with:
          node-version: 20
          cache: pnpm # 设置缓存
      - name: Setup Pages
        uses: actions/configure-pages@v3  # 在工作流程自动配置GithubPages
      - name: Install dependencies
        run: pnpm install # 安装依赖
      - name: Build with VitePress
        run: |
          pnpm run docs:build # 启动项目
          touch .nojekyll  # 通知githubpages不要使用Jekyll处理这个站点,不知道为啥不生效,就手动搞了
      - name: Upload artifact
        uses: actions/upload-pages-artifact@v2  # 上传构建产物
        with:
          path: docs/.vitepress/dist # 指定上传的路径,当前是根目录,如果是docs需要加docs/的前缀

  # 部署工作
  deploy:
    environment:
      name: github-pages
      url: ${{ steps.deployment.outputs.page_url }} # 从后续的输出中获取部署后的页面URL
    needs: build    # 在build后面完成
    runs-on: ubuntu-latest  # 运行在最新版本的ubuntu系统上
    name: Deploy
    steps:
      - name: Deploy to GitHub Pages
        id: deployment  # 指定id
        uses: actions/deploy-pages@v2 # 将之前的构建产物部署到github pages中
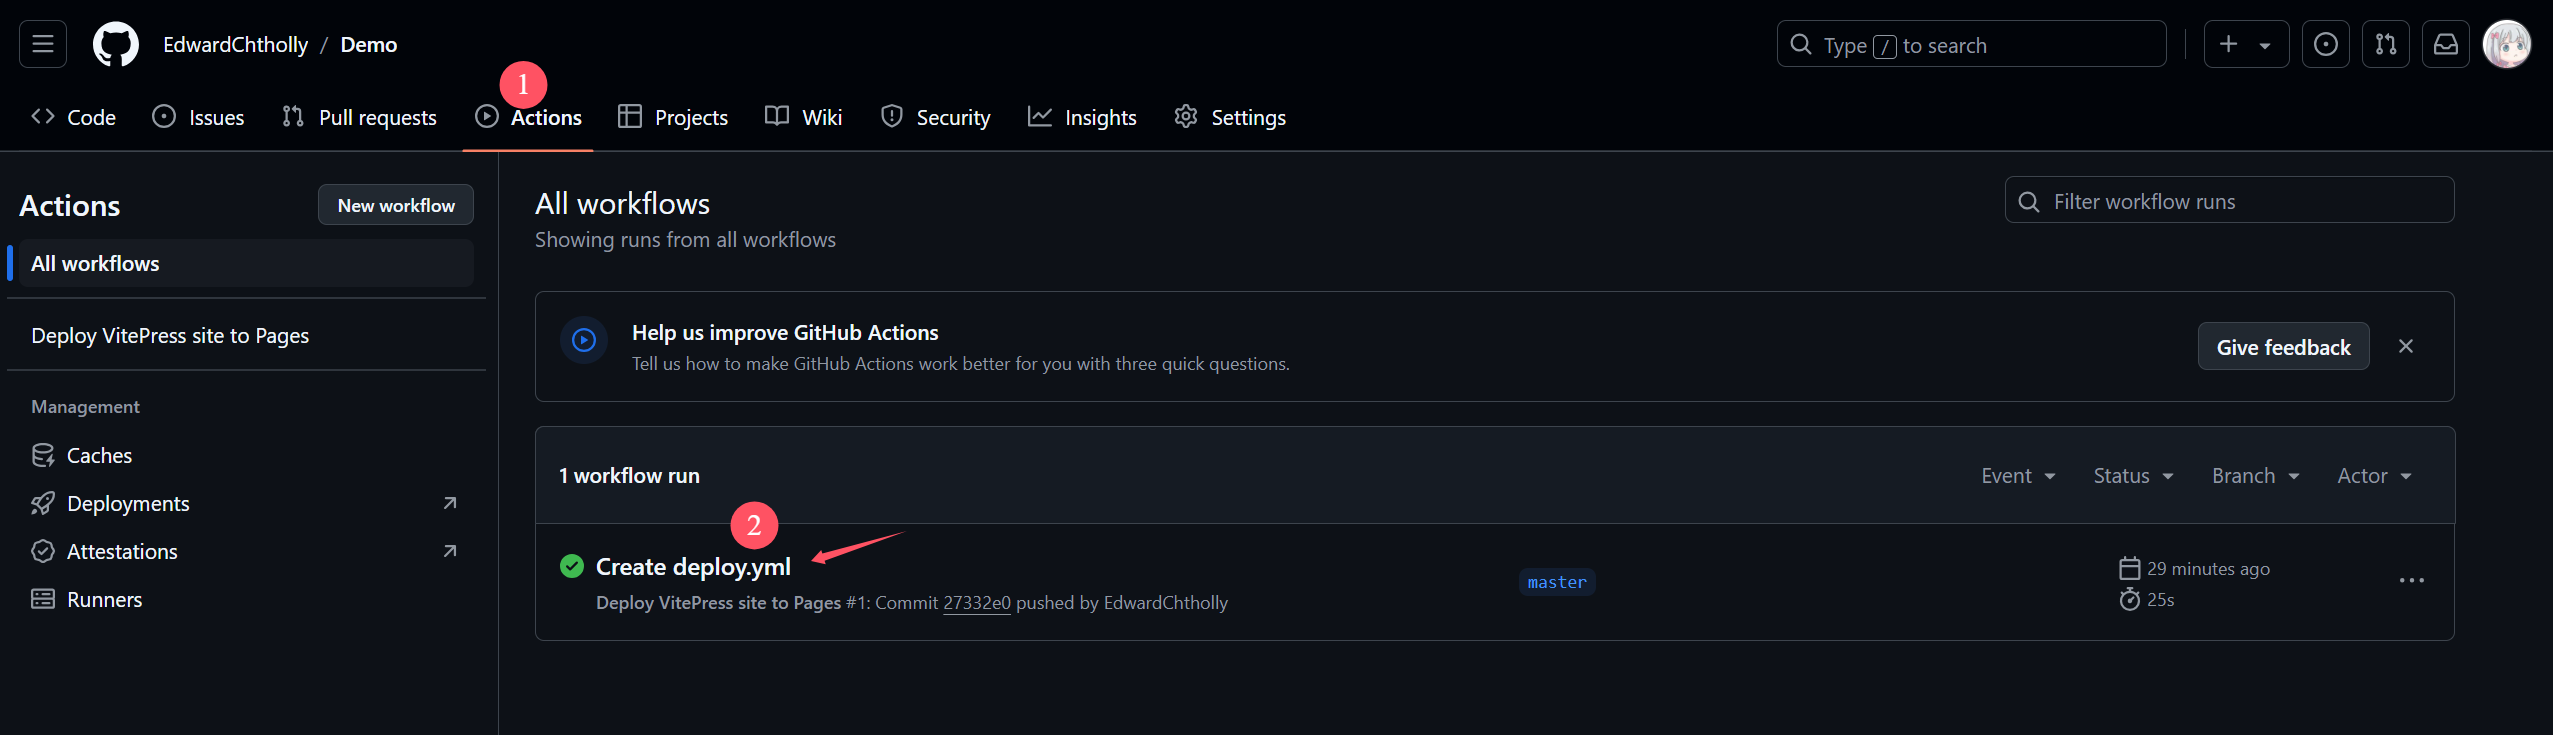
7. 等待创建完成
黄灯代表deploy进行中,可点击进去通过Details查看部署详情
WARNING
- deploy时失败提示:
Branch "master" is not allowed to deploy to github-pages due to environment protection rules.
解决方式:
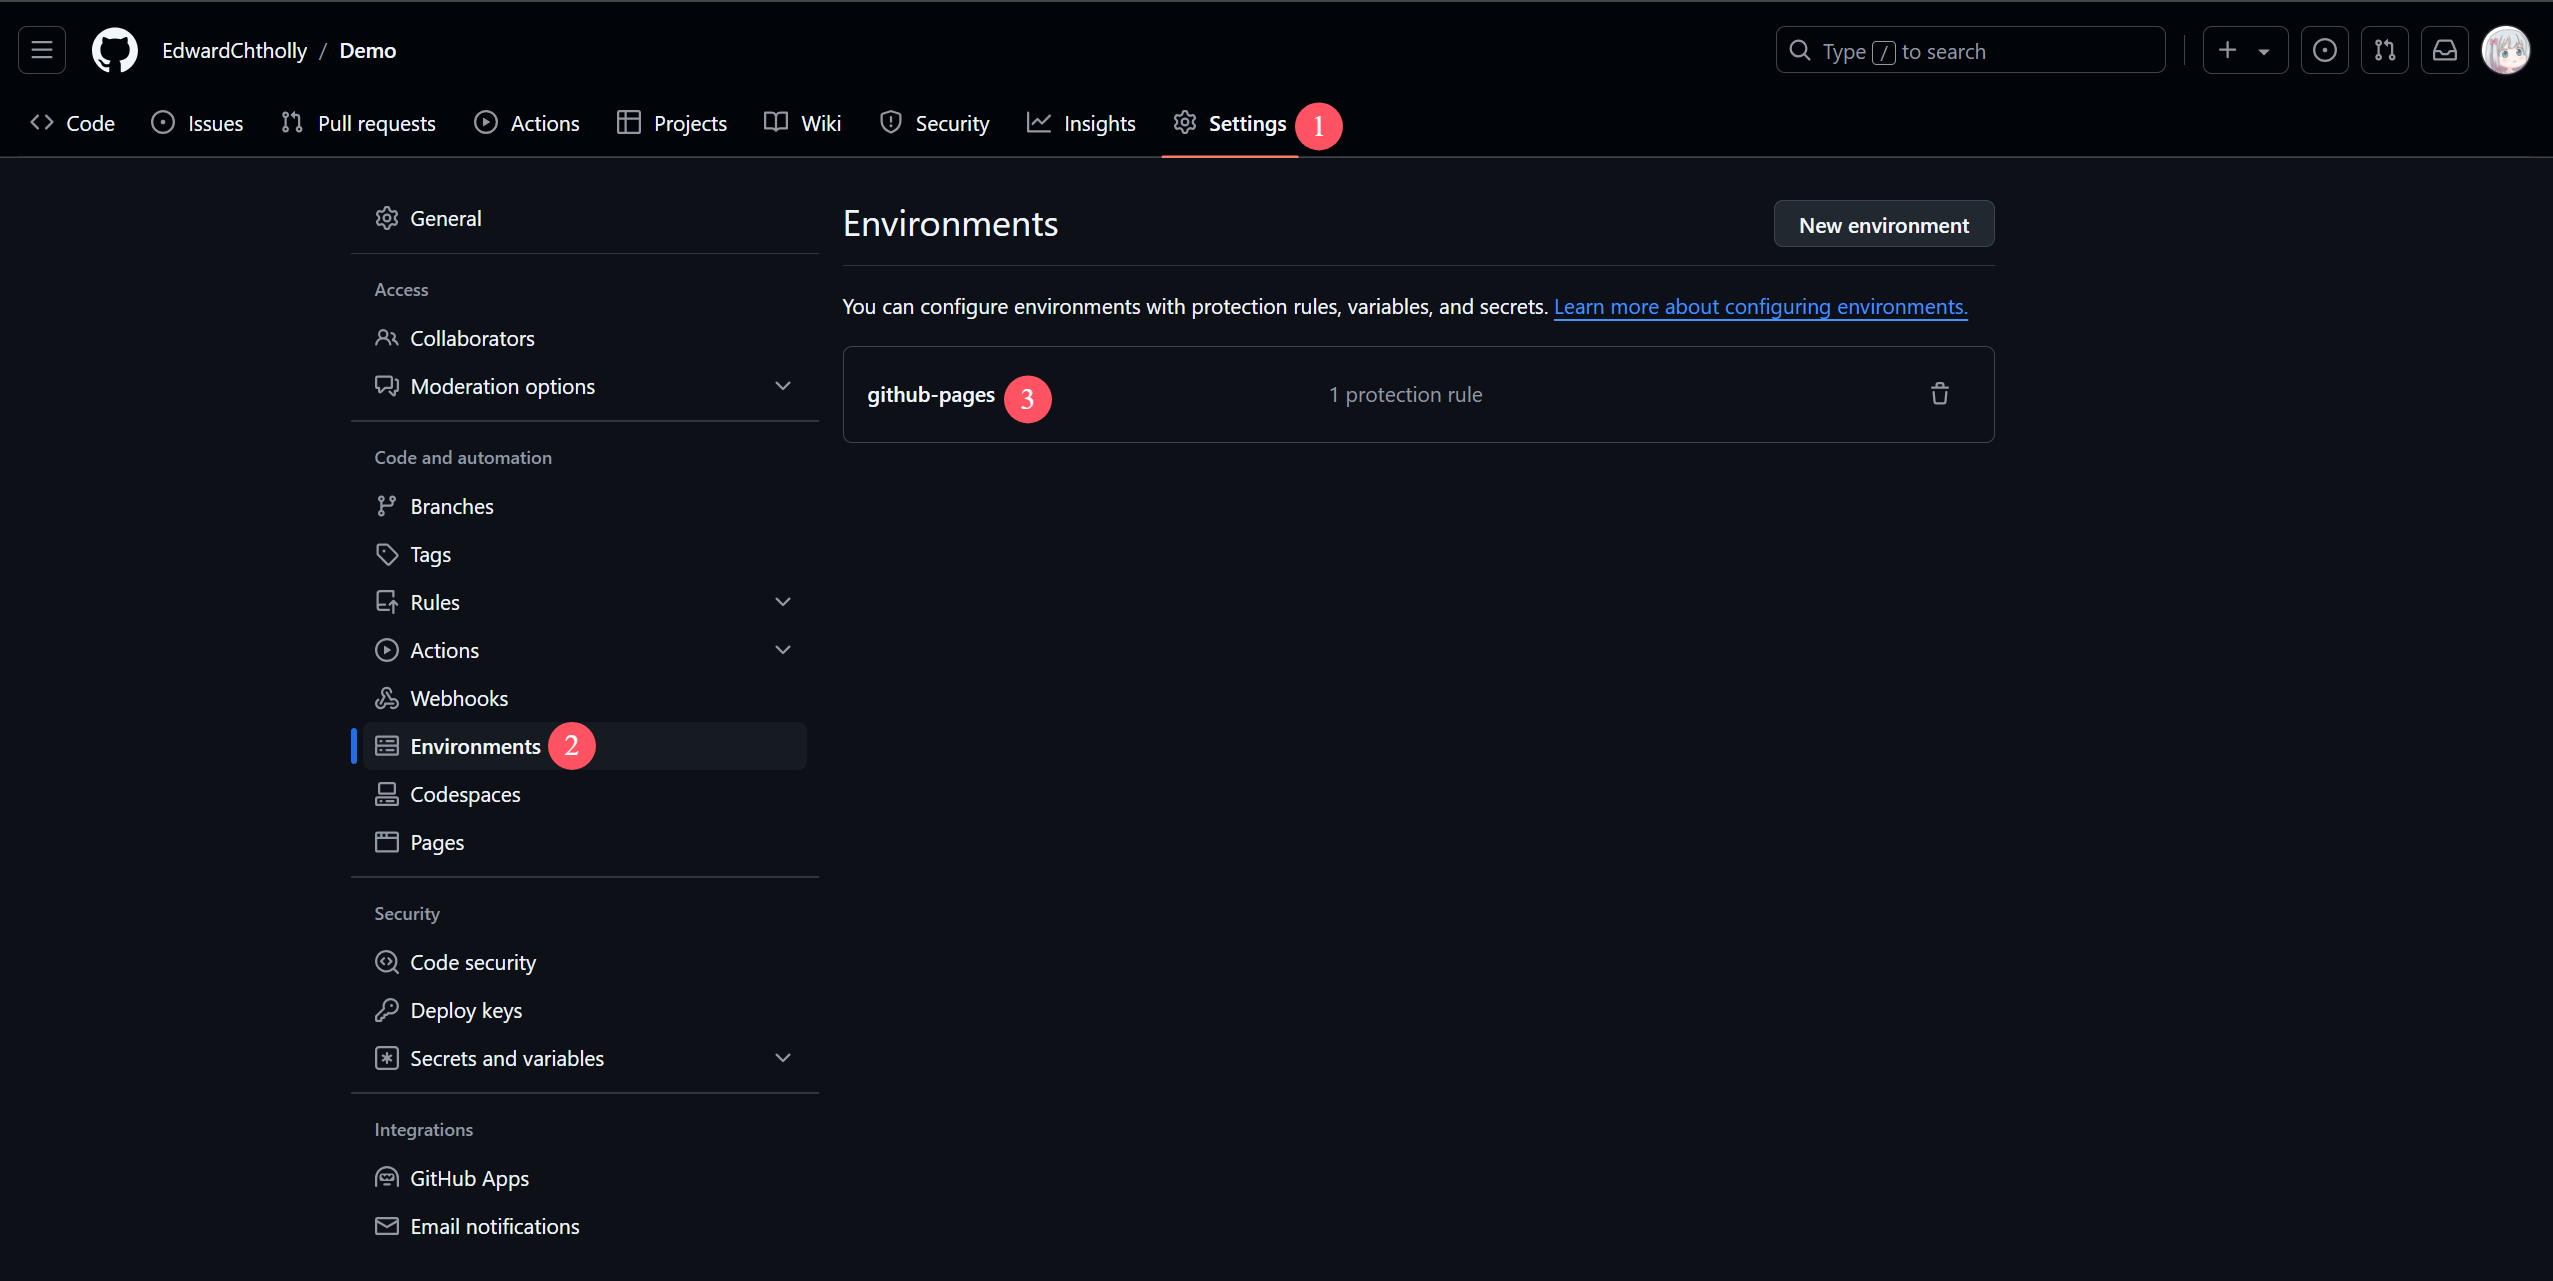
更新rule,Edit为master分支
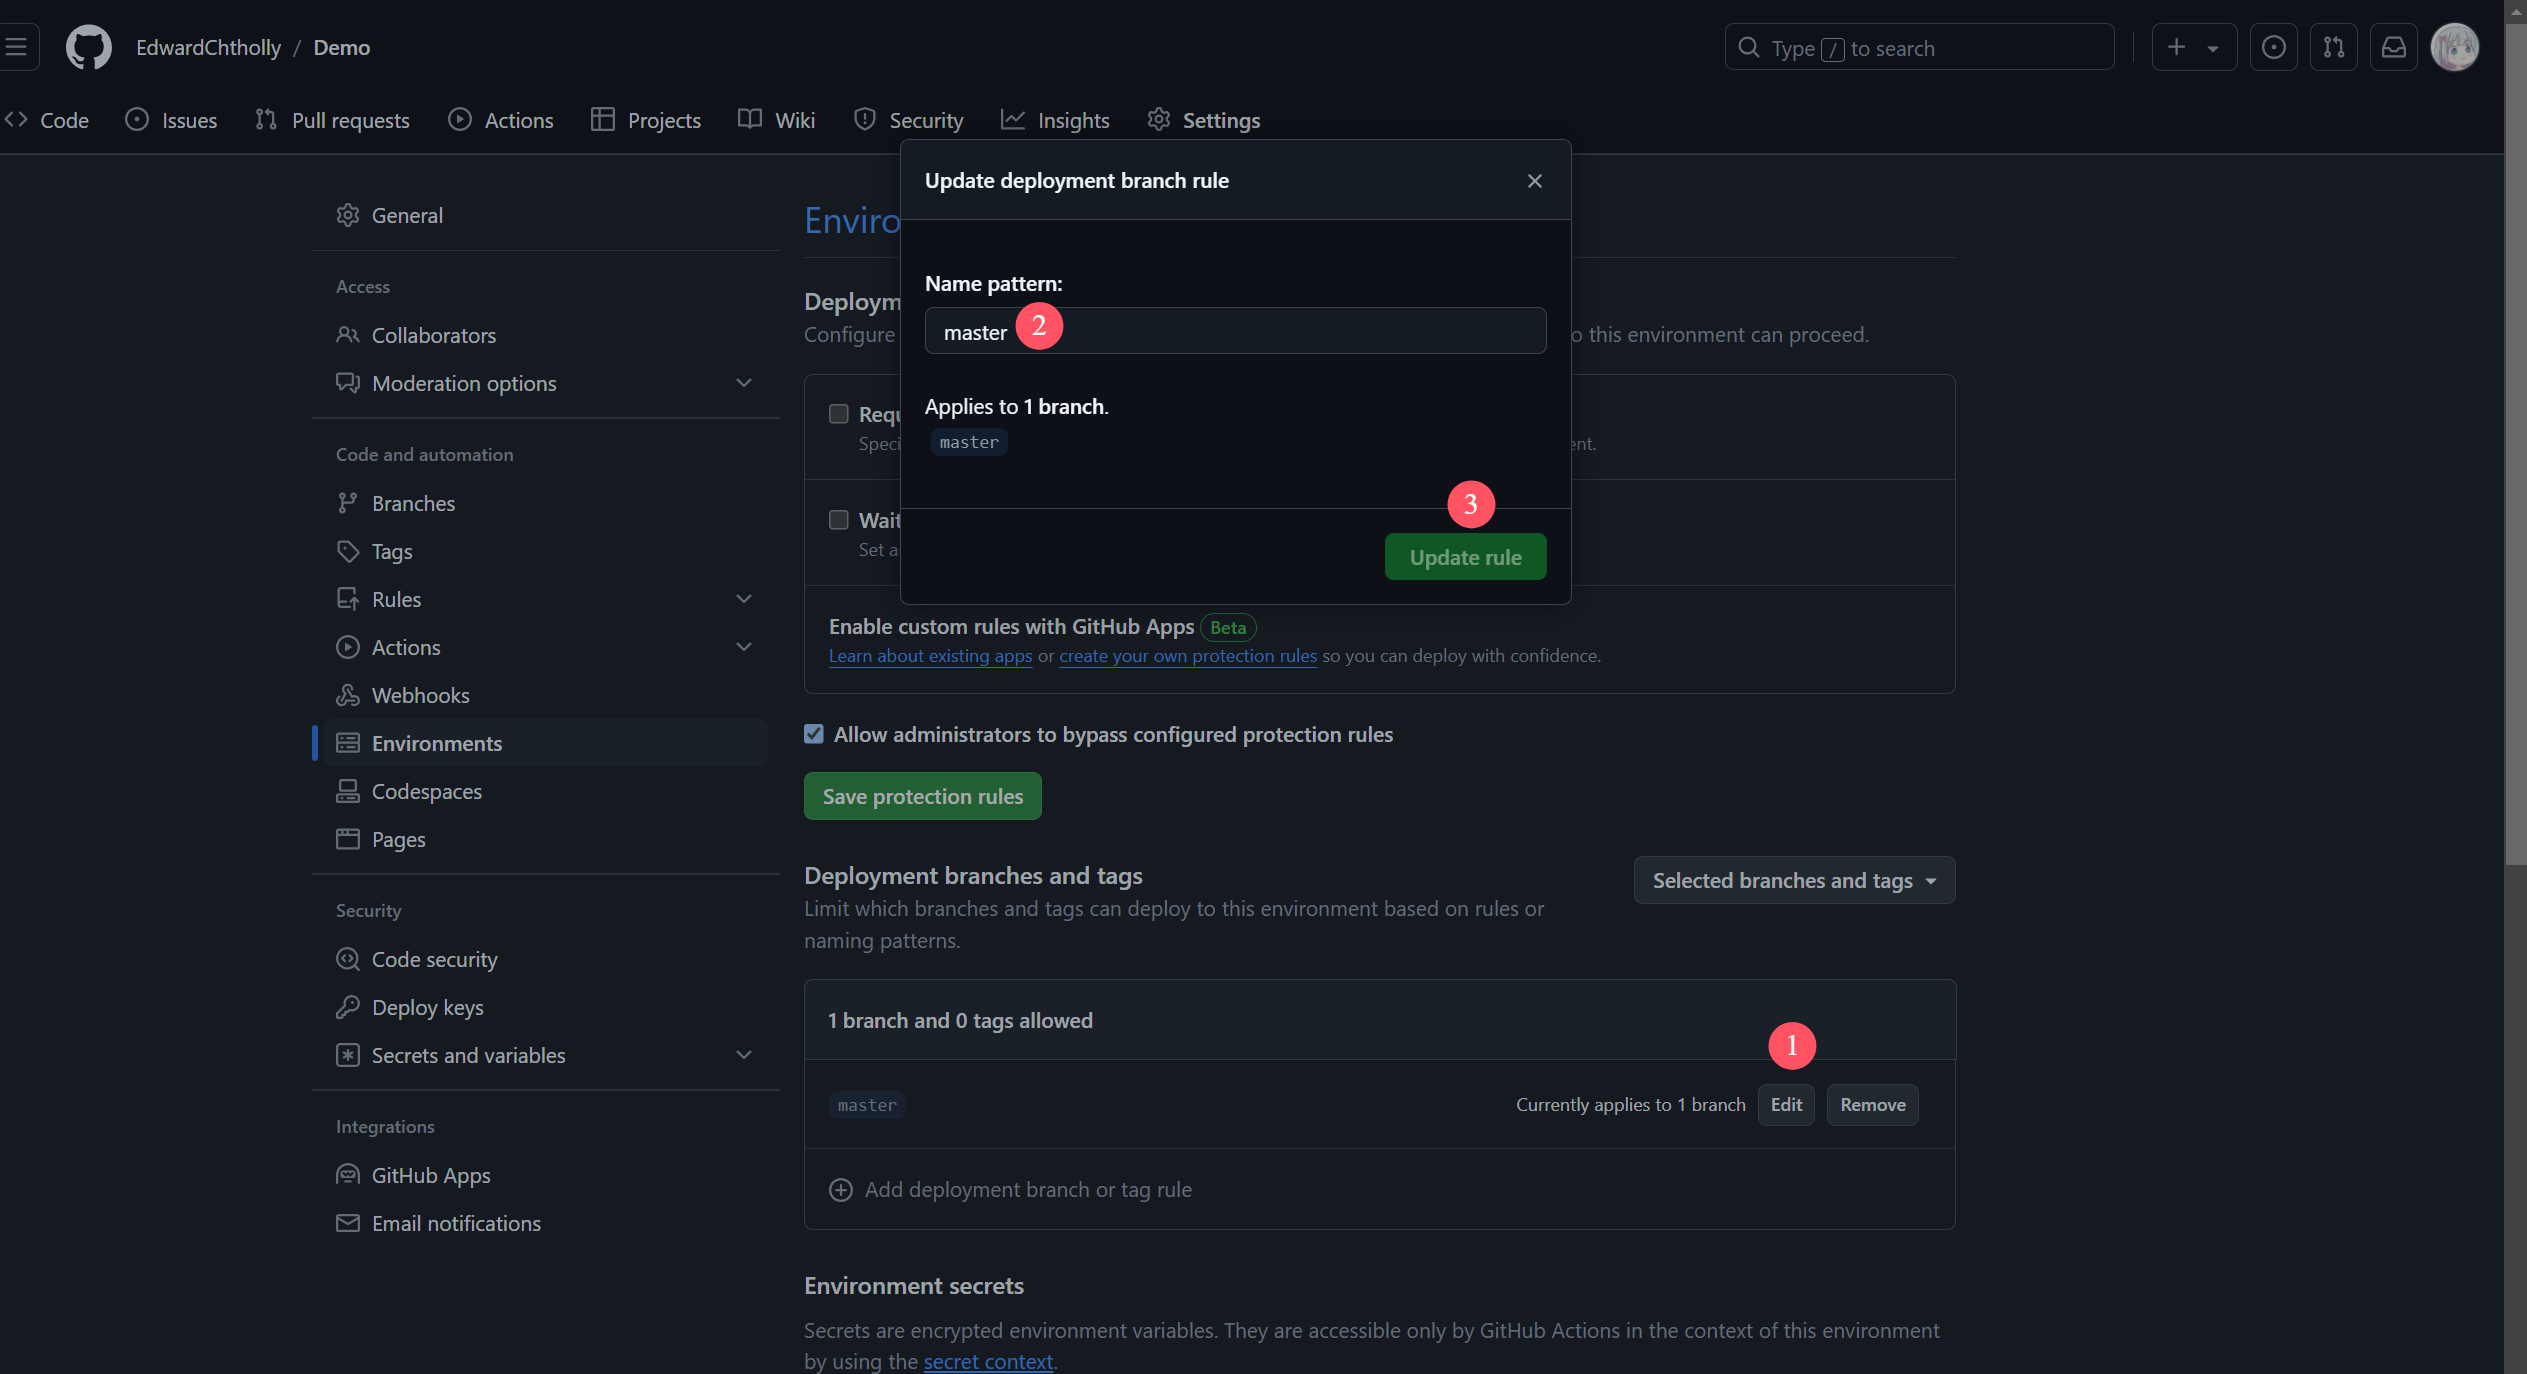
回到Actions,进入失败的工作流,进行Re-run jobs

8. 完成后访问地址
deploy绿灯完成后,进入以下路径访问已发布的地址
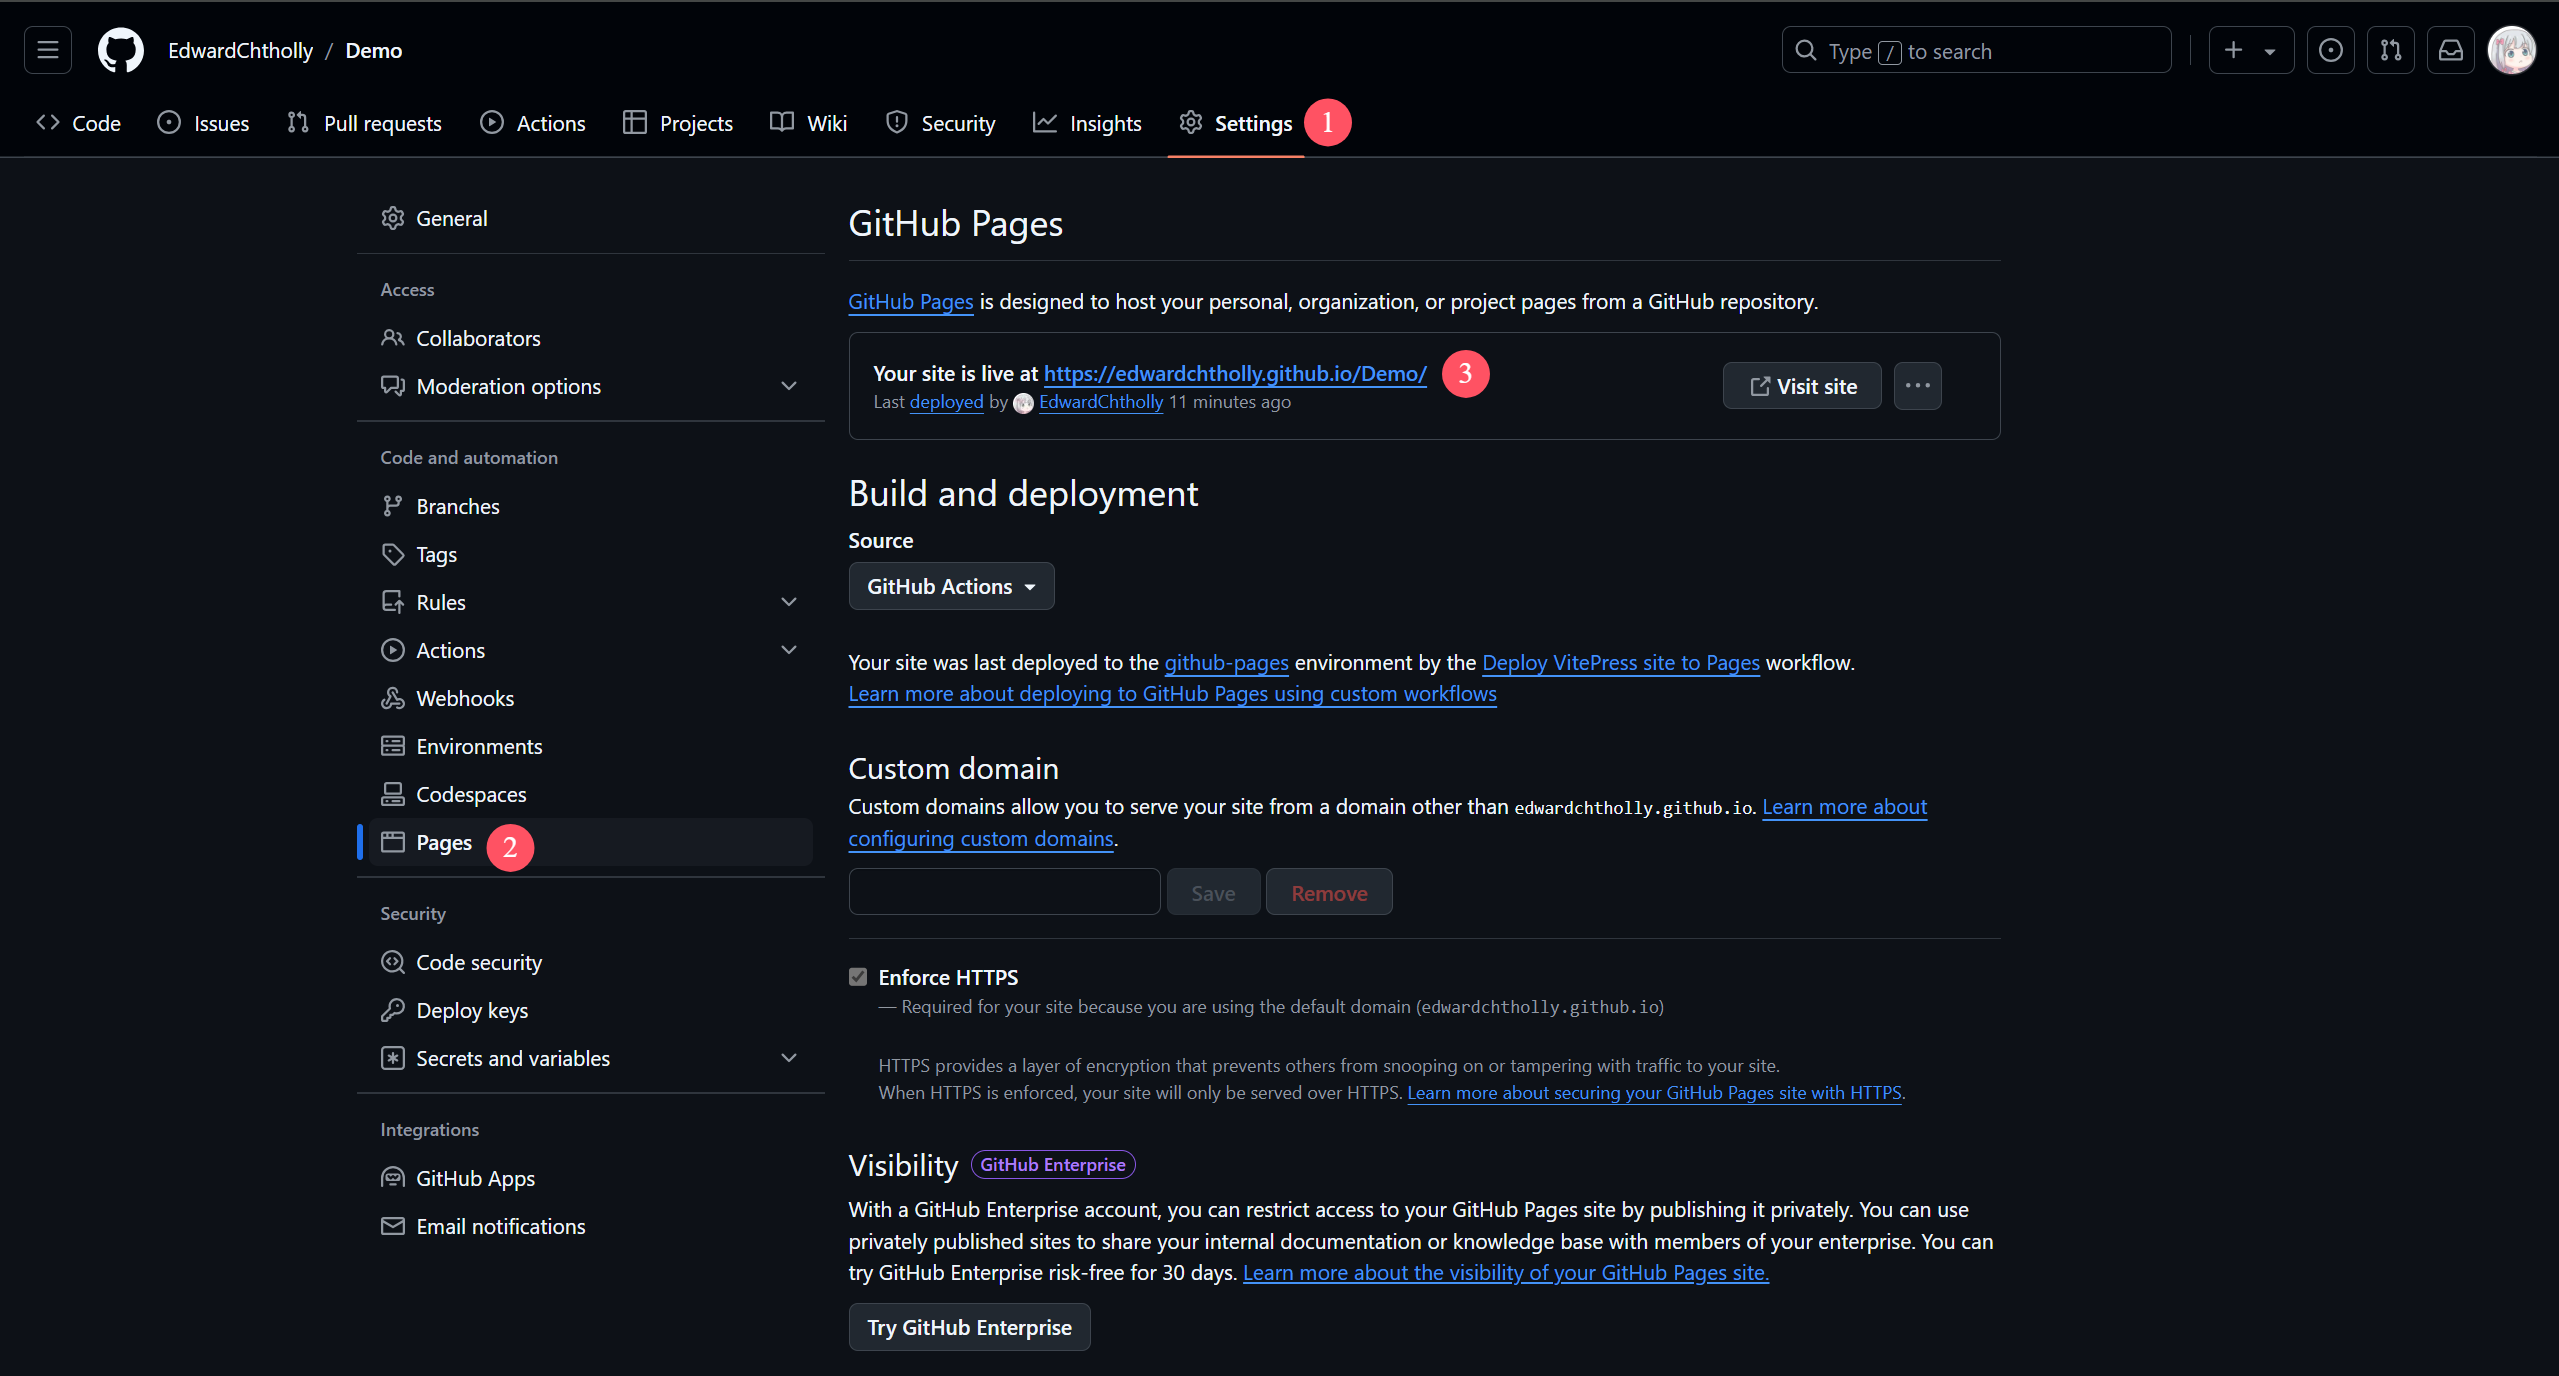
部署完成

9. 配置自定义域名
参考教程:https://blog.csdn.net/qq_34902437/article/details/140298754
- 域名请自行申请及购买
❗配置完成后,如出现页面布局异常的情况,请检查config.msj 文件中的路由地址
//base: '/vitepress/', //可能需要注销该行路由二、Docker打包tar文件部署
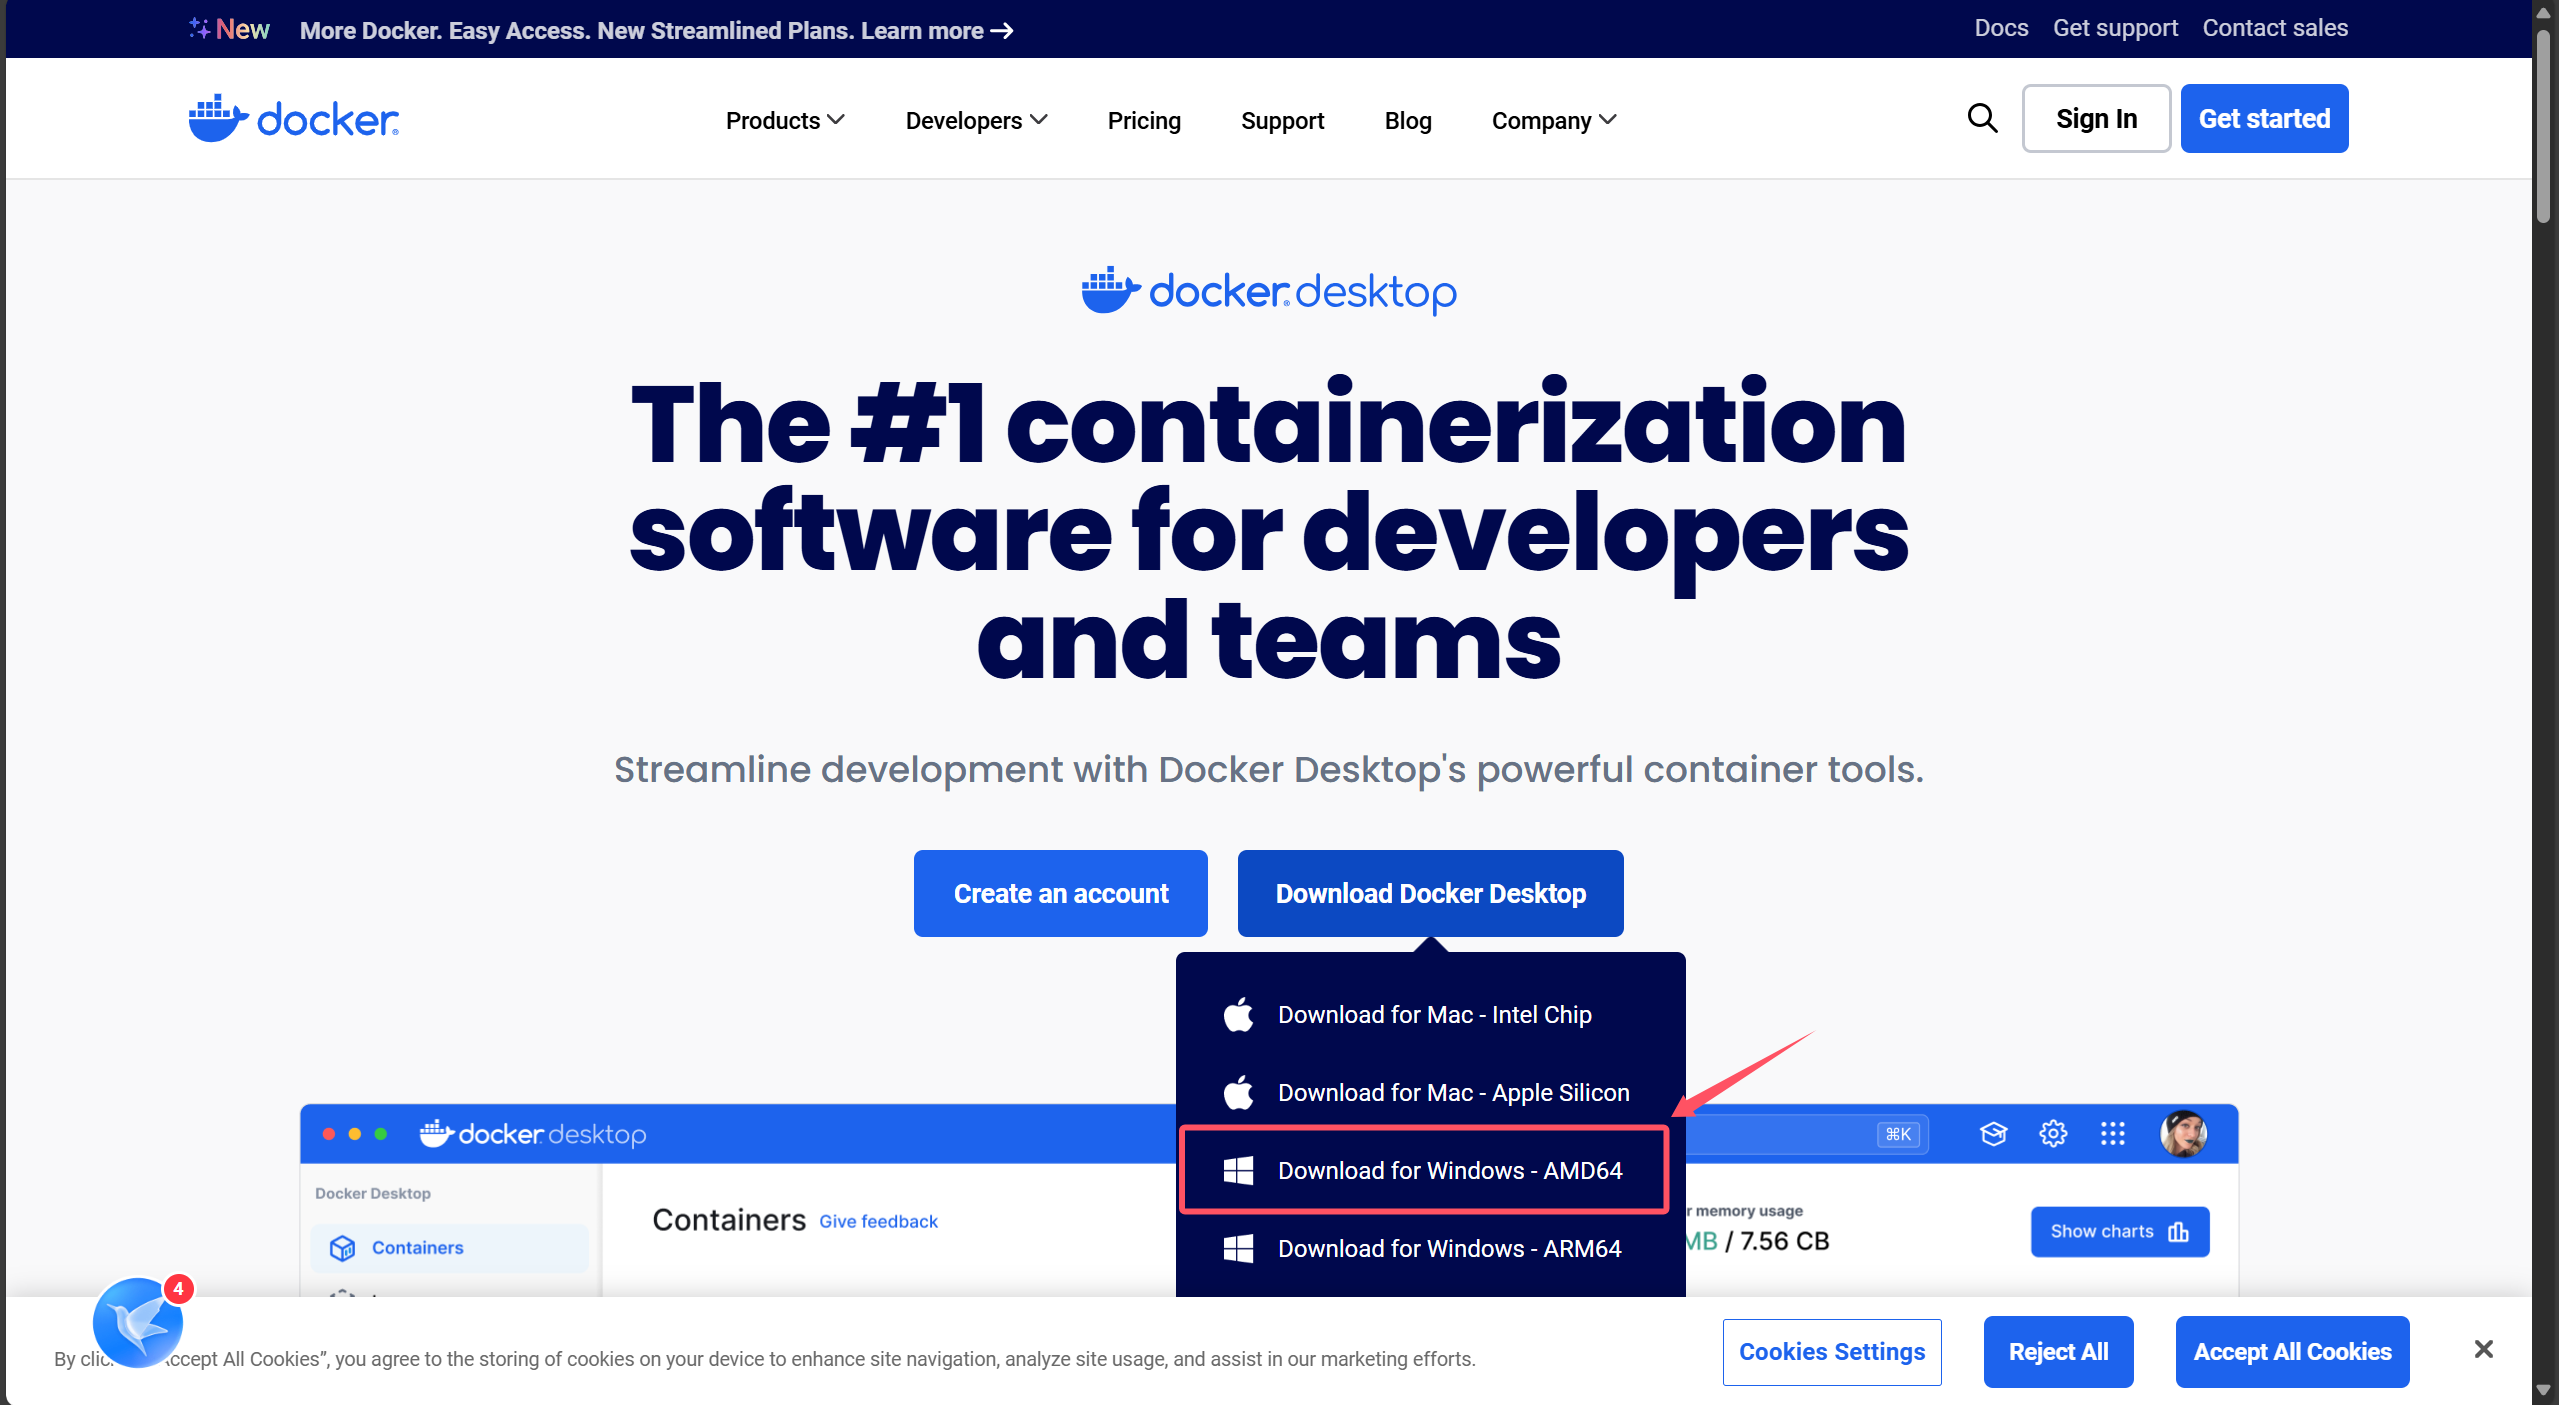
1. 安装docker
docker-desktop官网:https://www.docker.com/products/docker-desktop/
2. 配置及执行WSL命令
PS C:\Users\Administrator> wsl --update
正在检查更新。
已安装最新版本的适用于 Linux 的 Windows 子系统。
PS C:\Users\Administrator> wsl --shutdown
3. docker构建
在vscode中,项目文件夹内创建 Dockerfile 和 .dockerignore
# 使用一个 Node.js 环境来构建
FROM node:18-alpine AS builder

# 安装需要的软件包,包括 Git
RUN apk add --no-cache git

# 设置工作目录
WORKDIR /app

# 复制 package.json 和 package-lock.json
COPY package*.json ./

# 安装依赖
RUN npm install

# 复制项目文件
COPY . .

# 构建项目
RUN npm run docs:build

# 使用一个 Nginx 镜像部署应用
FROM nginx:alpine

# 复制构建输出到 Nginx 的 html 目录
COPY --from=builder /app/docs/.vitepress/dist /usr/share/nginx/html

# 暴露端口
EXPOSE 80

# 启动 Nginx
CMD ["nginx", "-g", "daemon off;"]node_modules
dist
.vitepress/cache4. 执行docker构建和打包命令
PS E:\vitepress> docker build -t my-vitepress-app .
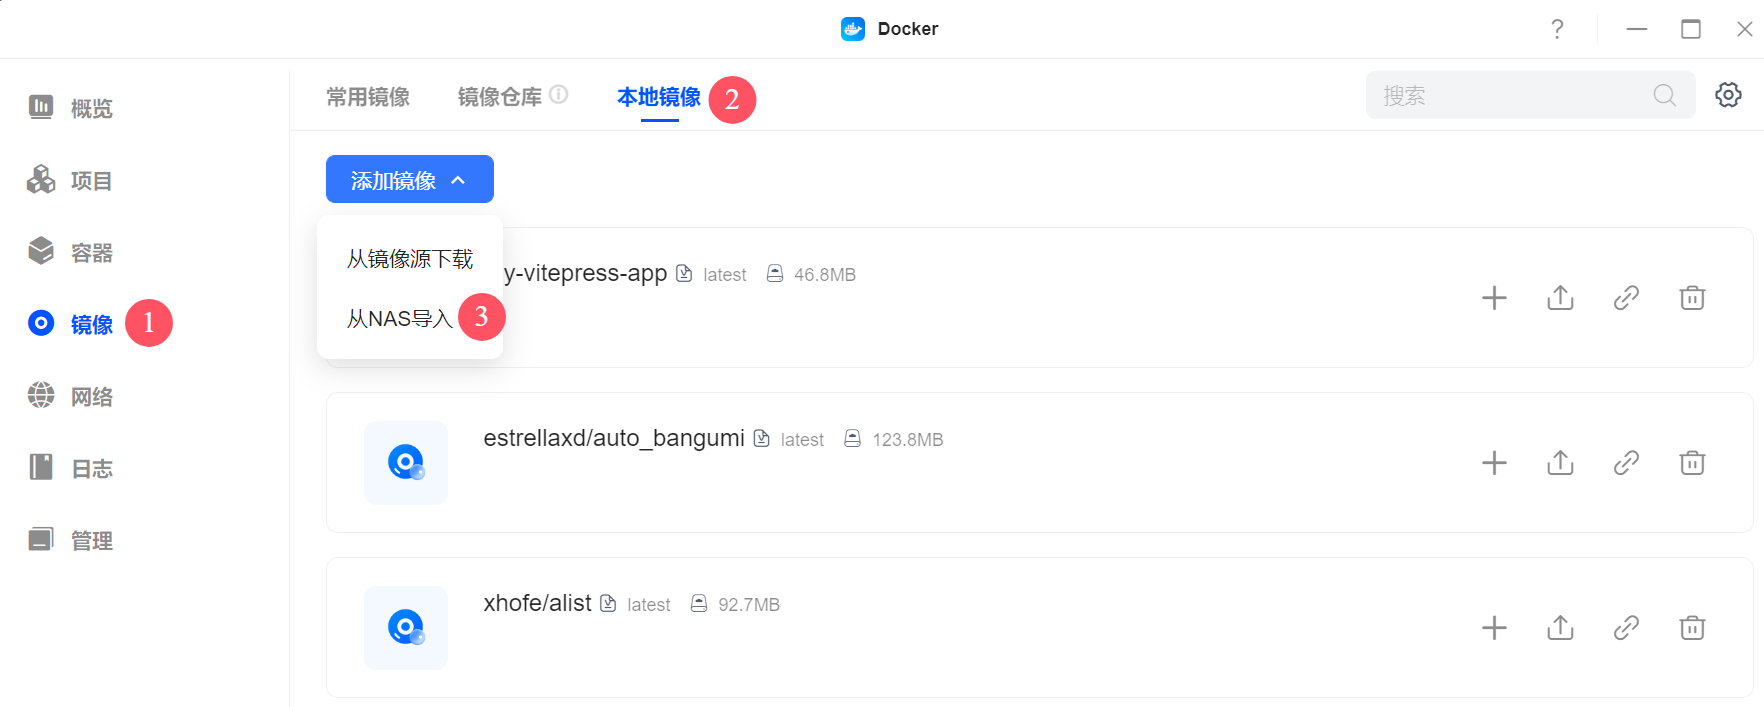
PS E:\vitepress> docker save -o my-vitepress-app.tar my-vitepress-app5. 在其他docker容器中,导入tar文件
- 以绿联云的UGOS Pro系统(设备DXP4800)为例
打开docker应用程序,选择镜像,从NAS导入镜像文件
三、Linux Nginx部署
还没高兴弄,以后补充